How do you sew a bra that fits? If you want to get the best fit out of your me-made bra, you’ve come to the right place: the Cashmerette Bra Fitting Guide!
Jump to another post in this series:
- Bra fitting guide overview
- How to choose your bra size
- How to make a test bra
- How to adjust the back band
- How to adjust the gore/bridge (Willowdale only)
- How to adjust the cups
- How to adjust the center insert (Loftus only)
- How to adjust the side seam angle
- How to adjust the straps
- How to adjust the underwires (Willowdale only)
- Adjusting the level of support and comfort
- How to make an asymmetrical bra
- Additional bra making resources
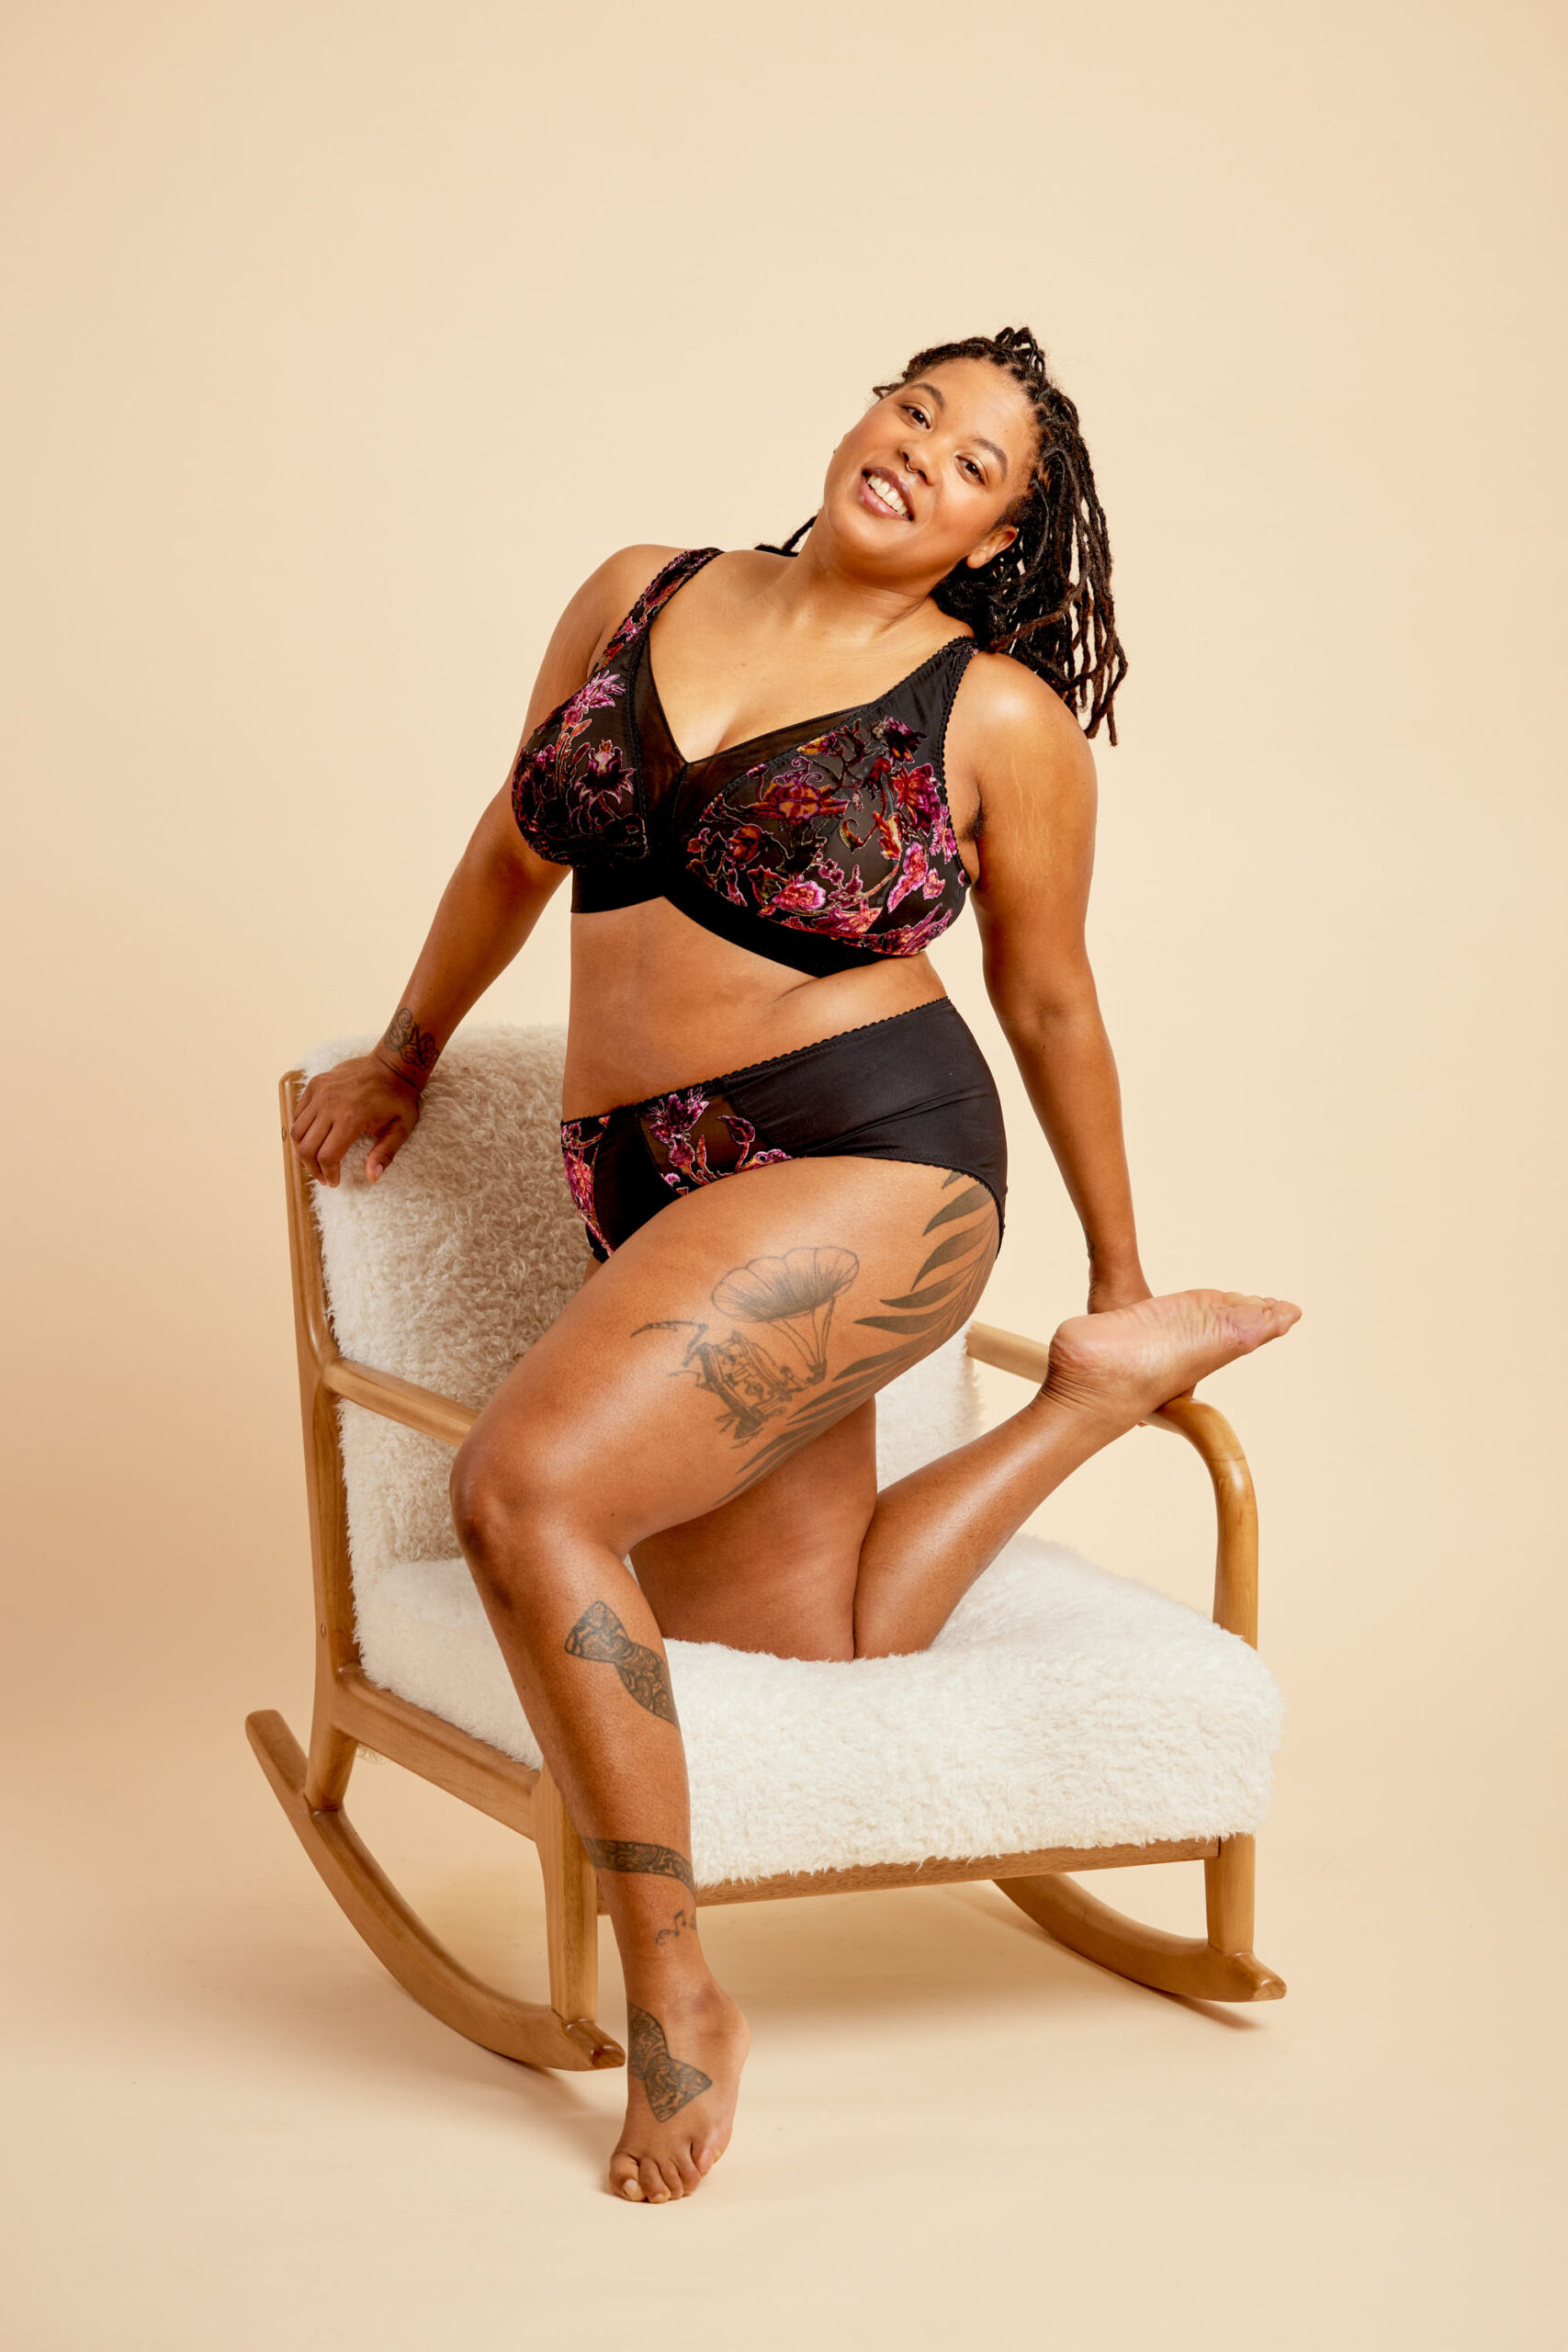
Cashmerette has two bra patterns designed to support and lift big boobs in band sizes 28-54 and cups C-J, all while looking absolutely fabulous (It’s a lot to ask of a bra, but they are up to the task!)
The Willowdale is a full frame, underwire bra sewing pattern while the Loftus is a non-underwire bralette sewing pattern.
If you have big boobs and you want to start with a bra sewing pattern that’s most likely to fit you right out of the gate, the Cashmerette bras are for you.
Bra fitting can seem like a bit of a mystery, so we’ve made it a whole lot more approachable with this bra fitting guide. Let’s get started!
The Cashmerette Bra Fitting Guide
Step 1: Get in the bra fitting mindset
How do you make a bra that fits? It’s TOTALLY possible to make a well-fitting bra, but often it takes a bit of experimentation. Breasts come in so many sizes, shapes, heights and projections, and we each have preferences for what fits and feels good to us—and as a result, it’s fairly rare that you instantly find the best size for you. It’s certainly not impossible! But if you approach bra-making with the mindset that you’ll need to spend a bit of time figuring out sizing and fitting, you’ll be setting yourself up for success. The great news is that once you figure it out, a world of well-fitting beautiful bras awaits!
Step 2: Start with the right size
Now that you’re in the bra-fitting mindset, let’s talk about how to calculate your bra size.
Bra sizing varies widely between countries and brands. You may have an idea in your head about your typical bra size, but it’s best to set that aside and choose your size based on your measurements.
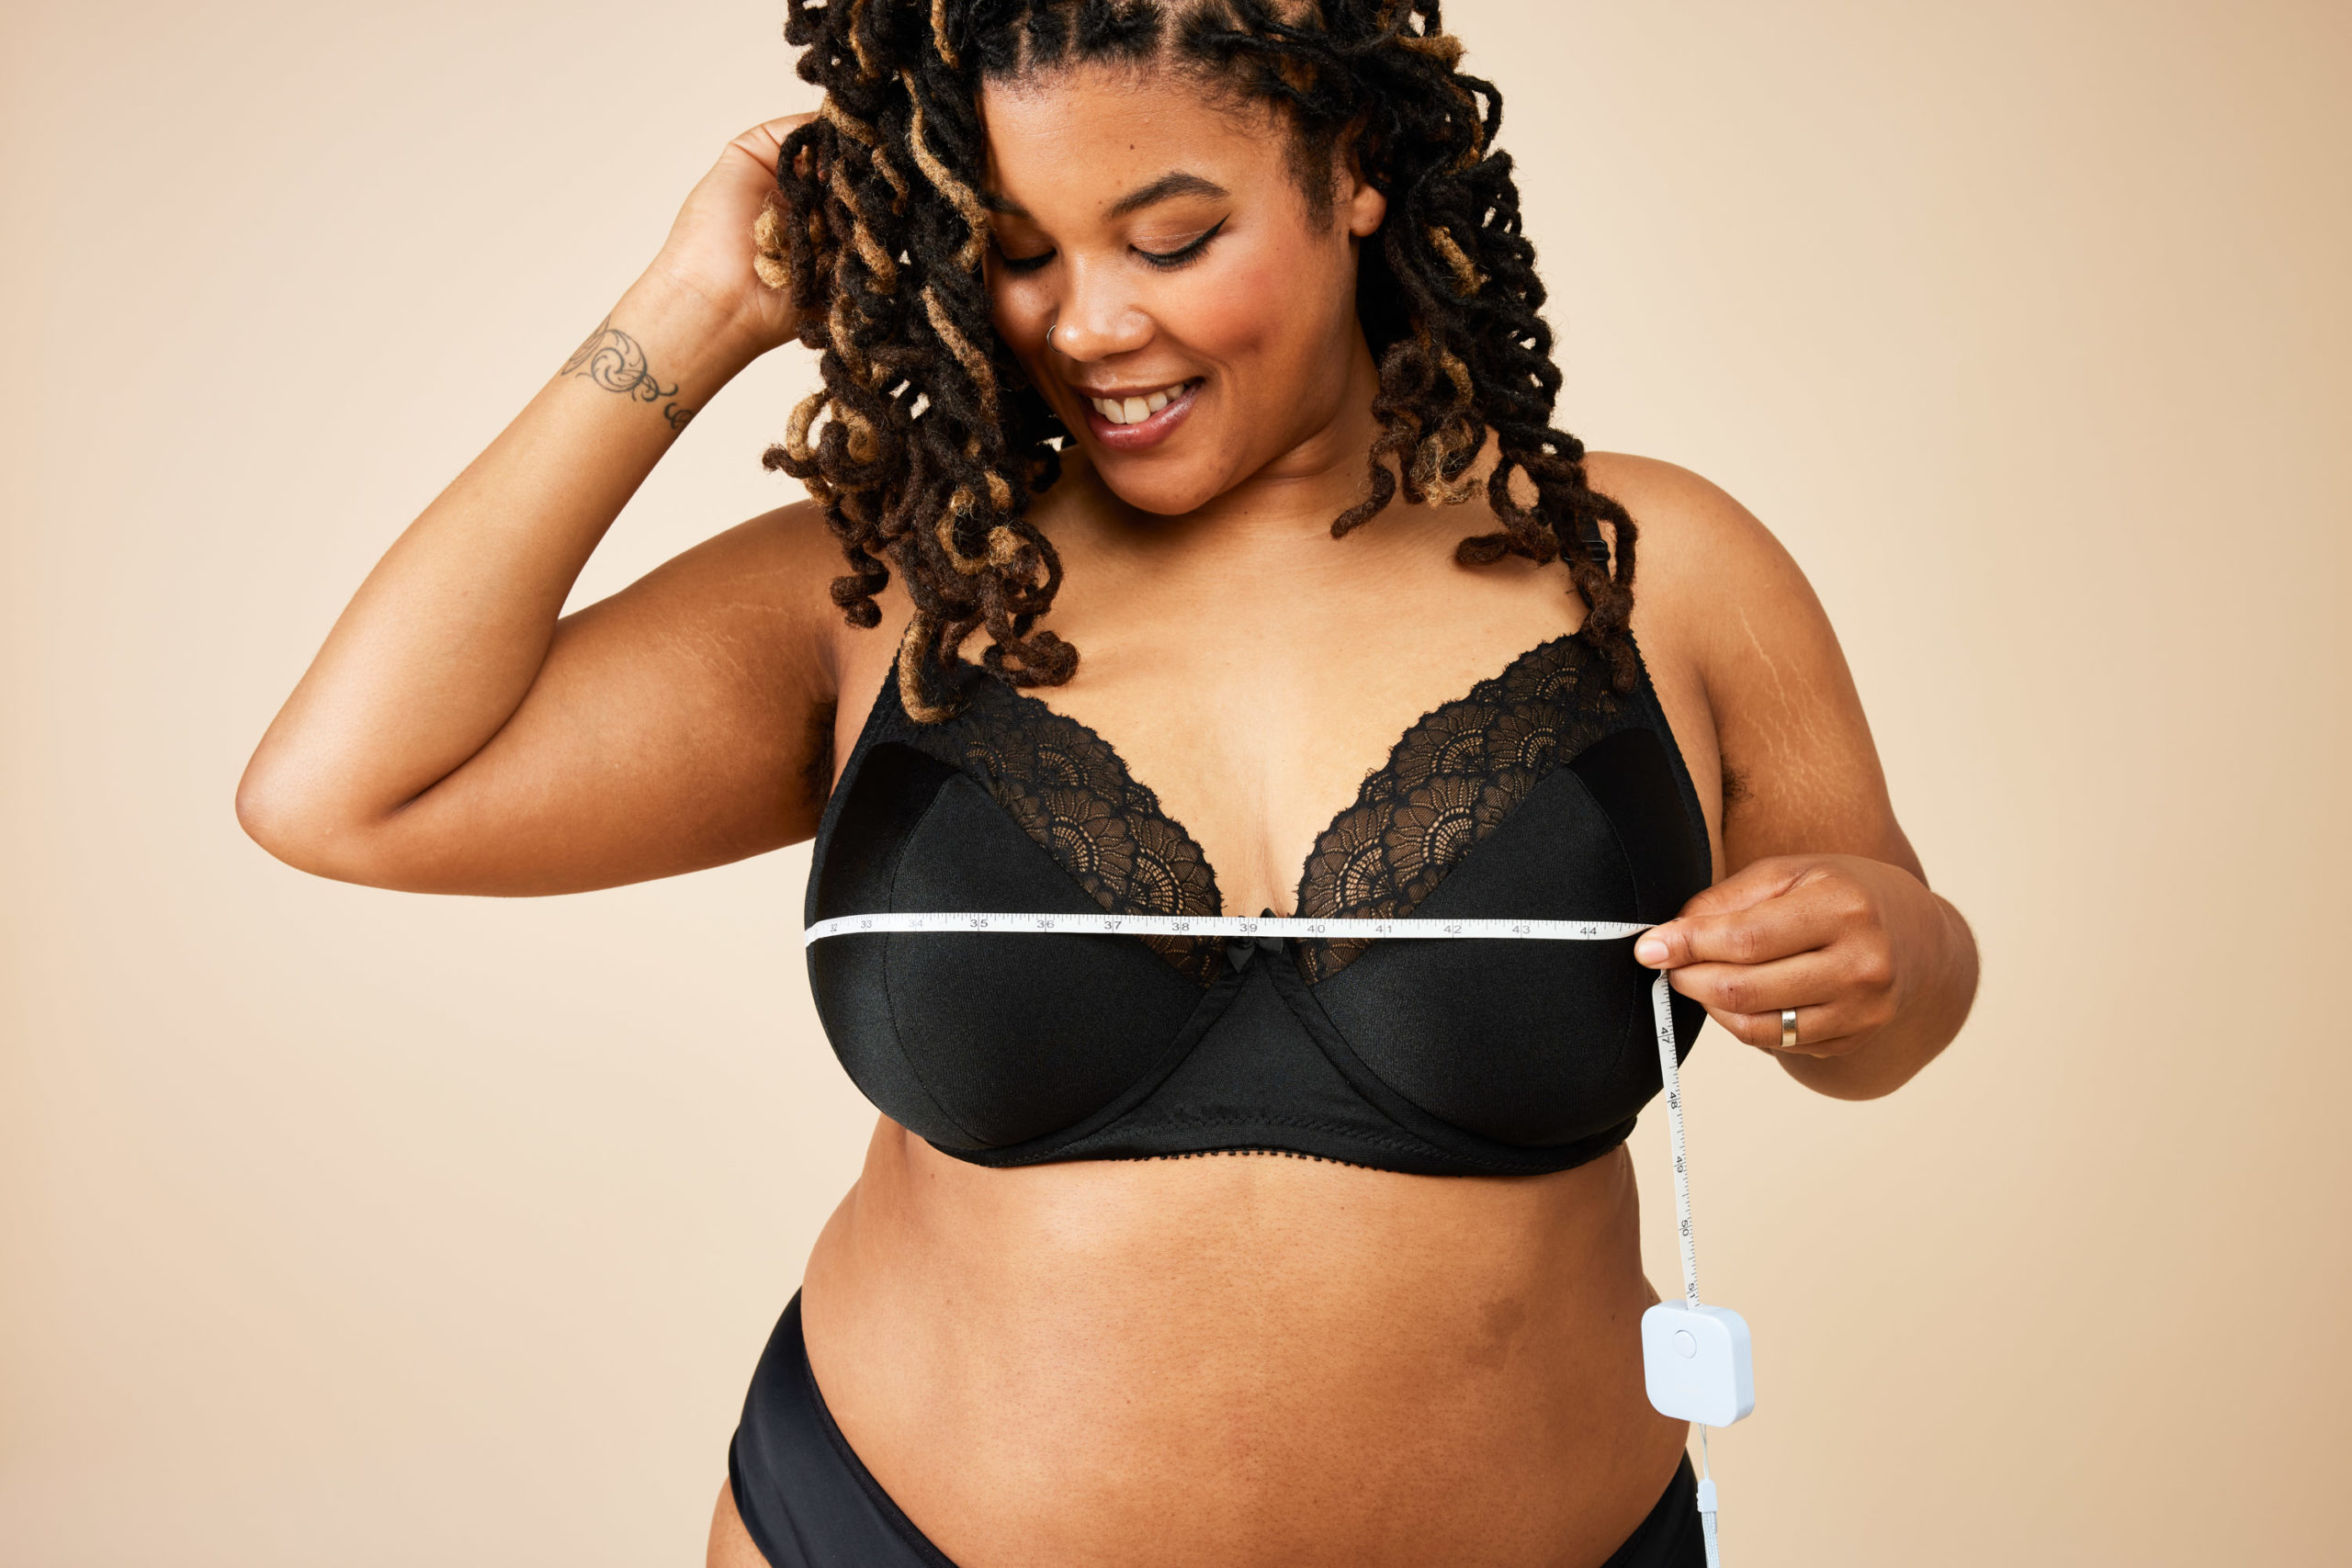
Start by taking your full bust and underbust measurements. It’s important to take these measurements at the start of every project, and try to wear your most supportive bra while doing so, if you have one (if not, just go with your best option!).
1. Your full bust is measured at the bust apex, which is the fullest part of your bust. This is the part that would hit the wall first if you walked directly into a wall, and may or may not be your nipples.
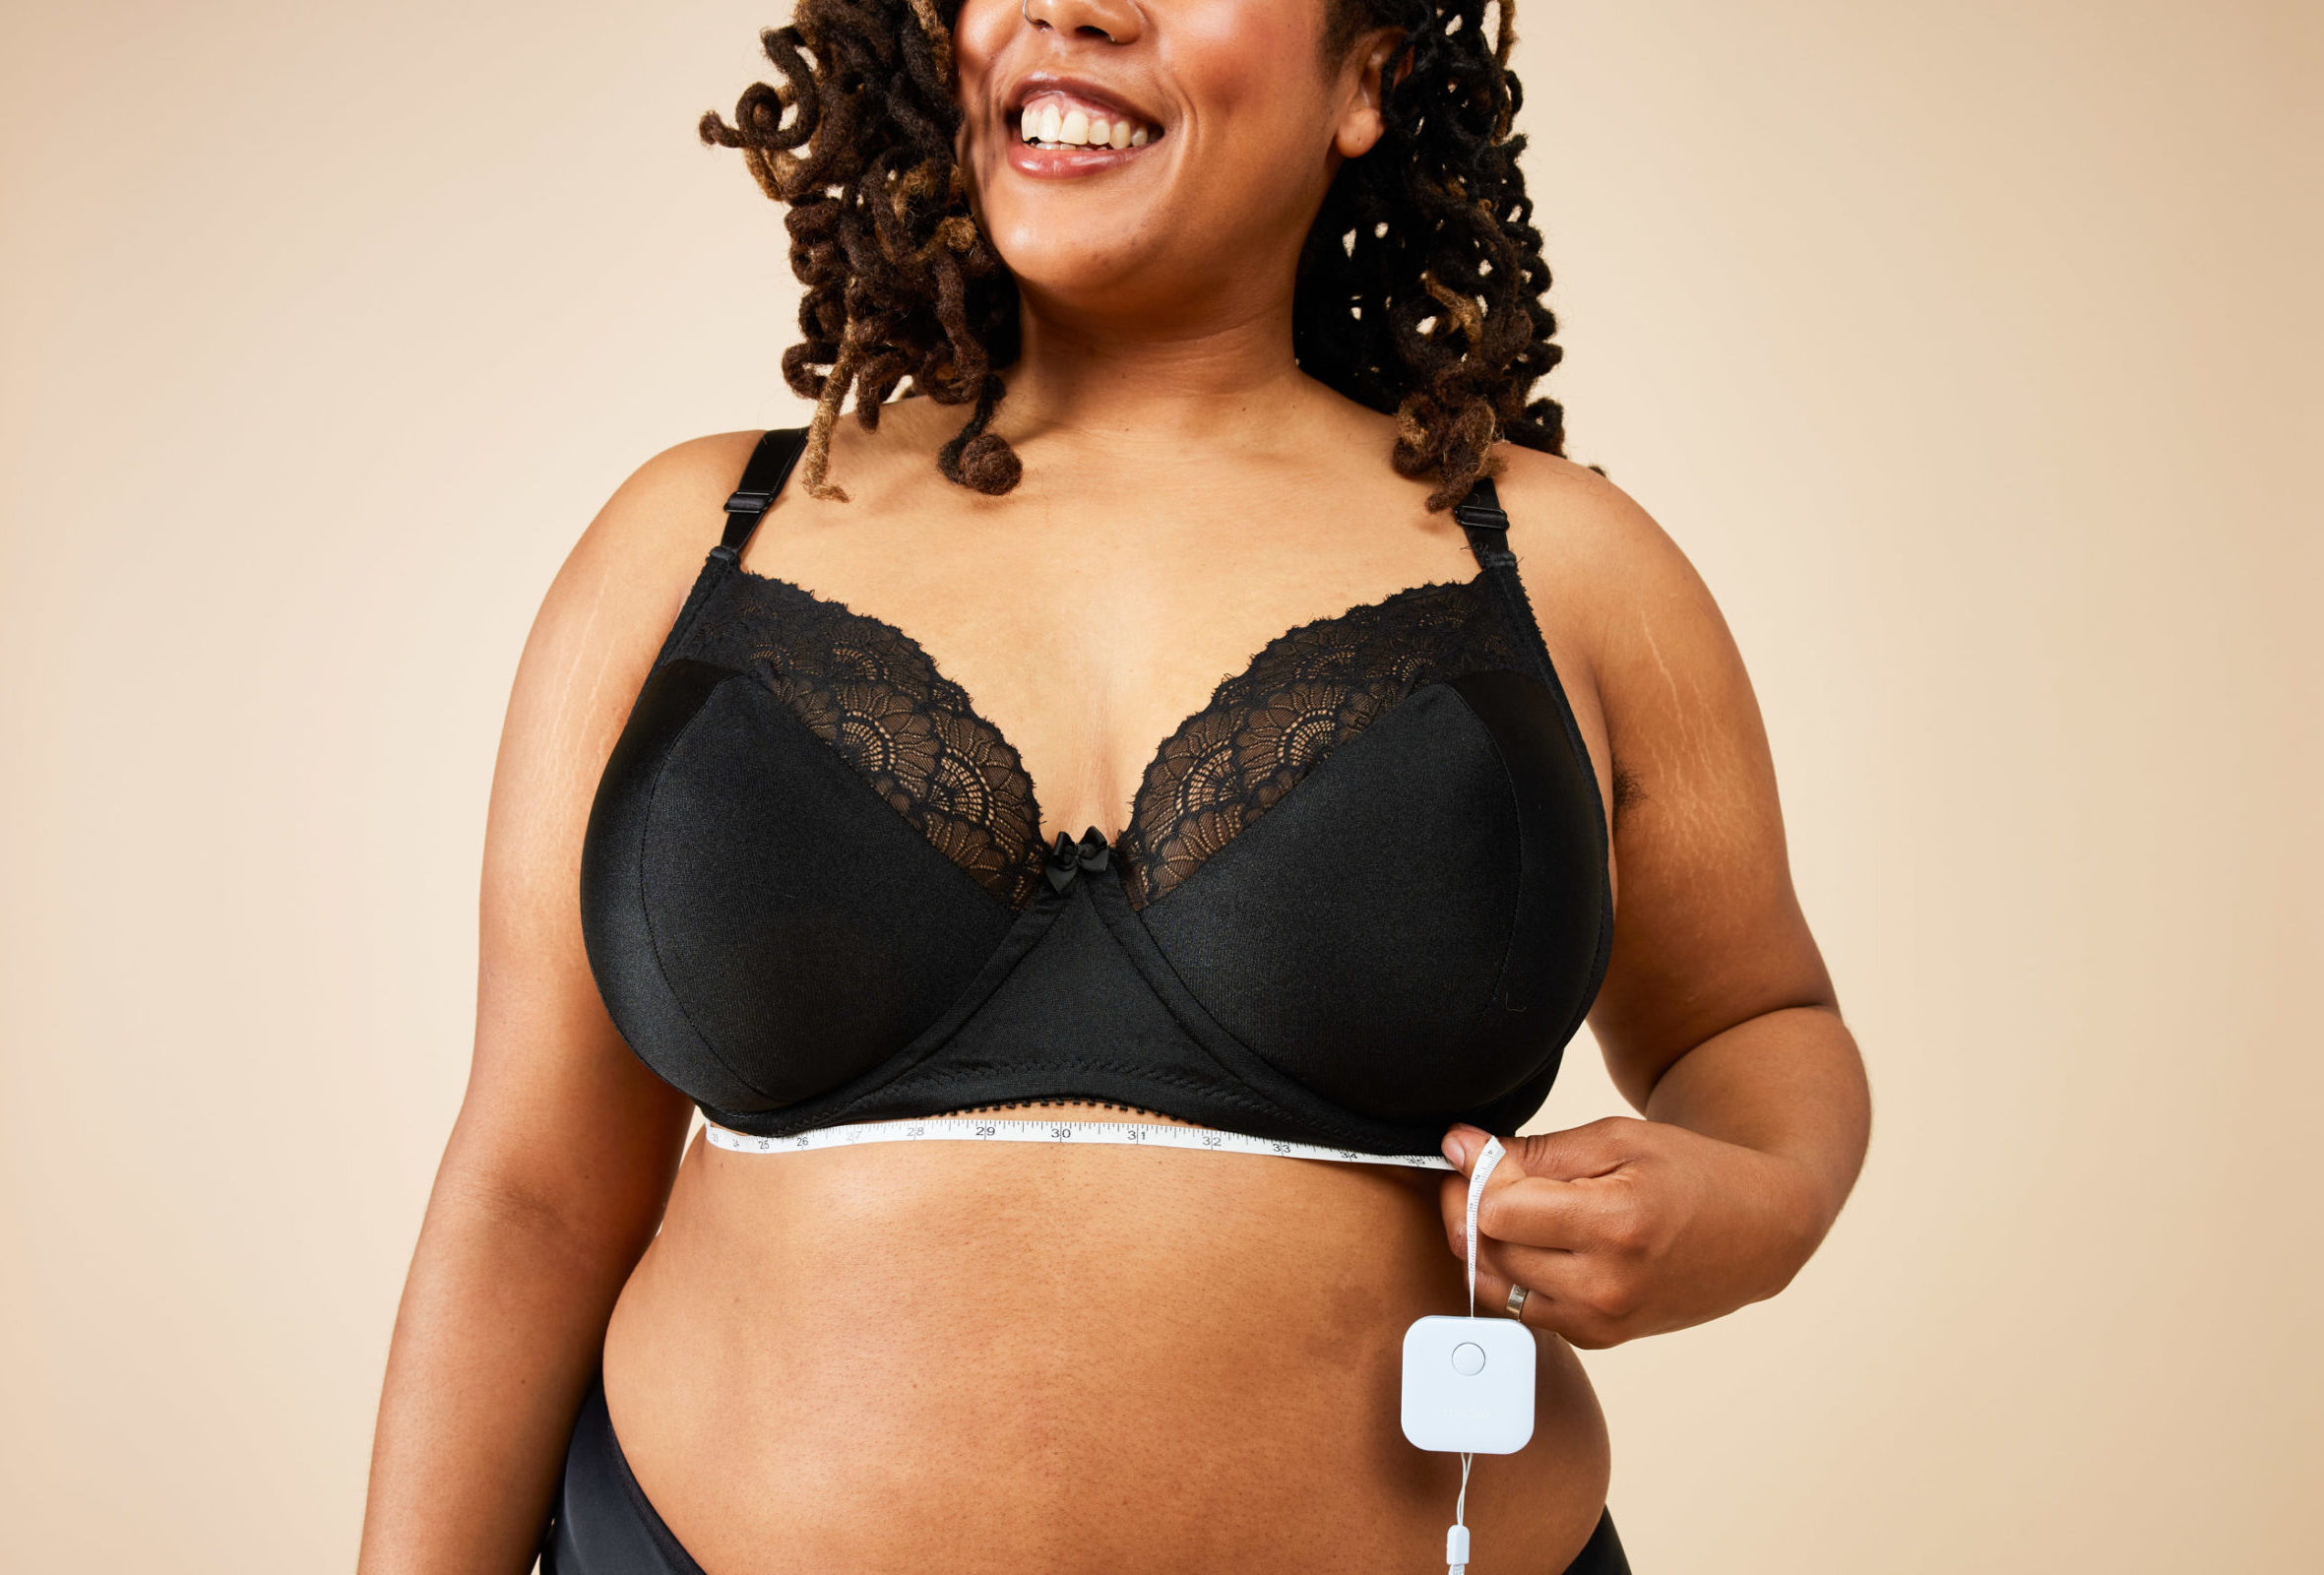
2. Your underbust is measured directly below your breasts, at the narrowest part of your rib cage, where your bra band will sit. Hold the measuring tape taut but be sure to breathe out.
Use your measurements to find your size in this table:

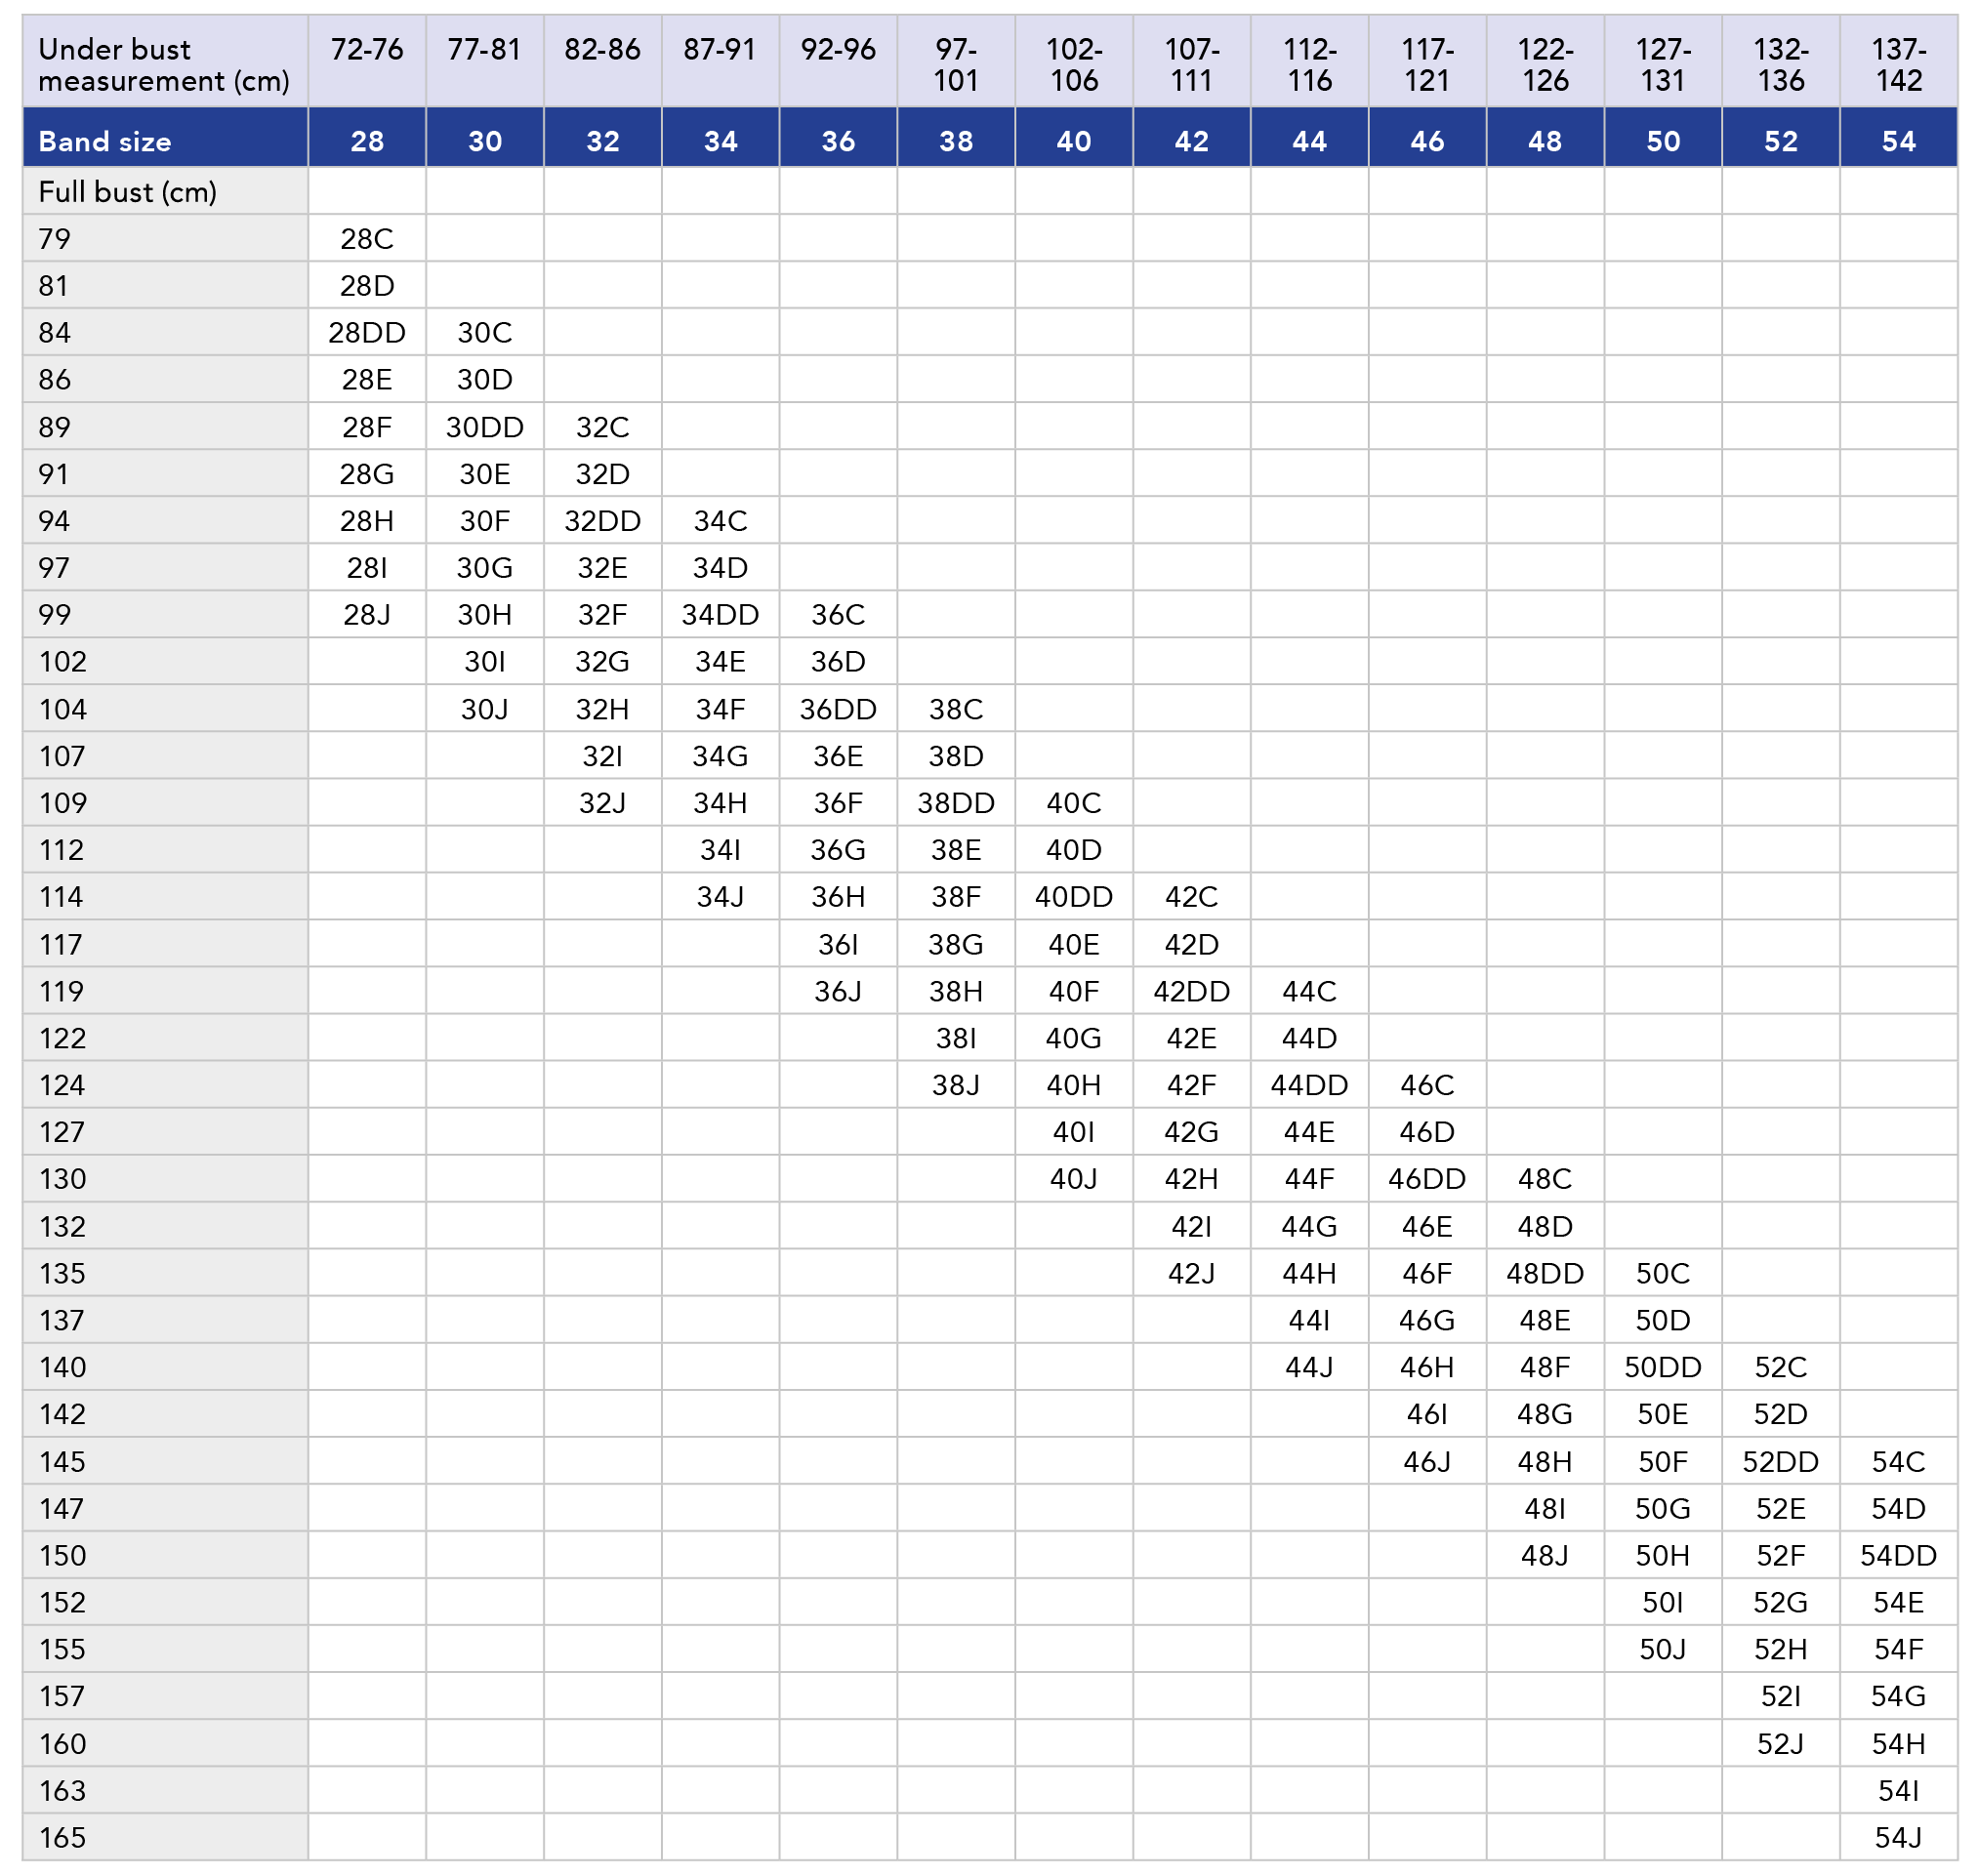
Want more help choosing your size? Are you outside of the size range? We’ve got a complete sizing guide here.
Step 3: Make a muslin (test garment)
Now that you’ve selected your starting size, it’s time to make a muslin. A muslin, also known as a toile, is a test garment that allows you to check the fit before cutting into your final fabric.
Here is where bra fitting is a little more tricky than regular garment fitting. The fabric that you use for a bra can have a radical impact on fit—as in, you could achieve a perfect fit with one fabric, and then you use a different one and it barely fits at all; this is much more so than when you’re fitting say, a top or a dress. For that reason, the IDEAL approach is to use the exact same fabrics for your muslin as you intend to use for your final bra. By doing that, you’re ensuring that your fitting process will result in a bra that fits at the end.
However, if you don’t have enough of your final fabric, or you want to use something more inexpensive, you need to find fabric that is as close as possible to your final fabric in both weight and stretch, and ideally in recovery too (how fast/much it “snaps” back into shape after being stretched).
You need to make an entire bra to get the best sense of the fit, because the various tensions through the fabric and elastic make a big difference, especially for large cup bras. If you want to be able to reuse your elastics and notions, you can baste them onto your muslin and remove them once you’ve assessed the fit.
Learn more about how to make a test bra »
Step 4: Assess the fit
Once you’ve sewn up your muslin, put it on and review the fit. Look at the following factors:
- Is the band sitting snugly against your torso, without digging in uncomfortably? Is it level around your body including across your back?
- Do your boobs fit in the cups without spilling over or having excess fabric?
- Is the underarm elastic sitting against your body, without cutting in or gaping?
For the Willowdale:
- Is the bridge sitting flush against your torso without pulling away, including at the centre gore at your ribcage?
- Is the underwire sitting comfortable under your boobs, without digging in or poking out?
For the Loftus:
- Are your boobs sitting in the right place with the support and coverage you want?
Make note of what you see and take photos if you can.
Step 5: Make adjustments
Now it’s time to make some tweaks. We recommend trying each adjustment one at a time on a new muslin because trying too many adjustments at once will create confusion about what’s working and what’s not. Work through the adjustments in this order:
For the Willowdale Bra:
-
If the band is too loose (at the tightest hook and eye) or is riding/arching up in the back, you’ll need to shorten it.
-
If the band is too tight (at the loosest hook and eye), you’ll need to add length.
-
Does the gore fit well in the gap between your breasts? If not, you may need to adjust the gore.
-
If the underwire is being pushed down below the breast root or digging in at the side; if your breast is spilling over the top or underneath the cup; if the cup is folding at the side; and/or if the wire is being pushed away from the chest wall by your breasts, try a larger cup size.
-
If the fabric is wrinkling or gaping at the neckline, or if the underwire is not sitting flush against the chest wall or side of the breast because the wire is too big, try going down a cup size.
-
If the cup is the right size but not the right shape (there is excess fabric at the upper cup or under the breast), you may need to adjust the shape of the cup.
-
If the band and cup are both too small, try going up a band size but use the same cup size.
-
If the band and cup are both too big, try going down a band size but use the same cup size.
-
If the band is too small and the cup is too big, try going up a band size but use a cup size 2 sizes smaller.
-
If the band is too big and the cup is too small, try going down a band size but use a cup size 2 sizes larger.
-
If the bra feels too tight or too loose in the underarms, try adjusting the side seam angle.
-
If the bra fits well but the underwire is digging or poking into your skin, or sticks too far out, you may need to try a different underwire.
-
If the straps are too wide and fall off the shoulder, you’ll need to adjust their positioning.
-
Many of us have asymmetrical boobs. You can use the adjustments above to tweak the fit of one cup. Here’s a tutorial for that.
For the Loftus Bralette:
1. Does the band fit?
- If the band is too loose (at the tightest hook and eye) or is riding/arching up in the back, you’ll need to shorten it.
- If the band is too tight (at the loosest hook and eye), you’ll need to add length.
2. Does the cup fit?
- If your breast is spilling over the top or underneath the cup; if the cup is folding at the side; try a larger cup size.
- If the fabric is wrinkling or gaping at the neckline, try going down a cup size.
- If the cup is the right size but not the right shape (there is excess fabric at the upper cup or under the breast), you may need to adjust the shape of the cup.
3. Does the center insert fit?
- Are the cups being pulled too far into the center or are spreading too far apart? You will need to adjust the width of the center insert.
- Does the neckline provide the support and coverage you want? Raise or lower the neckline.
- Does the neckline gape? Adjust the neckline.
4. Does the underarm elastic fit?
- If the bra feels too tight or too loose in the underarms, try adjusting the side seam angle.
5. Do the straps fit?
- If the straps are too wide and fall off the shoulder or too close to your neckline, you’ll need to adjust the angle of the strap.
- If the straps are finishing in the wrong place – adjust the front strap length.
- If the overall straps are too long or too short – change the back strap length.
6. Not enough support provided?
- If you need more support at the back, double the back powermesh.
- If you want a little more support all around, shorten all elastics.
- If you want to change the shape of your boob inside the bra, modify the powerbar.
7. Does one side fit but not the other?
- Many of us have asymmetrical boobs. You can use the adjustments above to tweak the fit of one cup. Here’s a tutorial for that.
Step 6: Repeat
Once you’ve identified the adjustments you need to make, try those adjustments on a new muslin, then try that muslin on and review the fit again.
When to stop fitting
Anytime we’re fitting garments to our own bodies, it can be easy to fall into the trap of overfitting. You’re up close and personal with this garment, seeing every fit issue intimately, and that can make it hard to know when to stop fitting.
Our bras need to be comfortable, but they don’t need to be perfect. Expecting perfection will only lead to frustration and loss of motivation, so when you feel you’ve achieved a good enough fit—it’s time to call it done, and be happy that you’ve achieved something you may never have been able to buy in Ready to Wear!
Here are some questions you can ask yourself if you’re not sure whether to declare victory:
- Does the bra feel comfortable?
- Can you move around in it, in the ways you would expect from a bra?
- Do you like how it looks worn underneath your clothing?
- Does it fit better than bras you were wearing before?
- Are you proud of it?
Where to get additional bra fitting help
We’ll be sharing a long list of bra making and fitting resources soon, but here are our top recommendations for where to get additional help with bra fitting:
- Sewing Bras with Beverly Johnson: Step-by-step video classes on Craftsy
- Cloth Habit’s Bra Making Library: Free resources and tutorials for bra making and fitting
- Bra Making Forum Facebook group: A group focused on bra making, where you can post your photos and get fitting help from other bra makers
- The International Bra Sewing Bee: Classes and sewalongs for beginners and advanced bra makers
- Cashmerette Facebook group (all sizes or plus sizes only): Share photos of your Willowdale and get fitting help from other Cashmerette sewists
Disclaimer: we may receive a small commission should you choose to make a purchase using these links.
You can also email us at hello@cashmerette.com for personalized fitting advice from our knowledgeable team.
Let’s start fitting!
If you’re ready to start sewing and fitting your first Willowdale Bra or Loftus Bralette, then let’s get going!
Jump to another post in this series:
- Bra fitting guide overview
- How to choose your bra size
- How to make a test bra
- How to adjust the back band
- How to adjust the gore/bridge (Willowdale only)
- How to adjust the cups
- How to adjust the center insert (Loftus only)
- How to adjust the side seam angle
- How to adjust the straps
- How to adjust the underwires (Willowdale only)
- Adjusting the level of support and comfort
- How to make an asymmetrical bra
- Additional bra making resources
As you are a world wide company, it would be handy to know what size 28-54 is. In Australia we go 8 – 30. You have said big boobs but what is classified as big? I read your how to fit (which I already know as I make bras) to see if there was a size comparison. There isn’t. Because you said at the start of the intro it’s for big boobs, I don’t think this pattern is for me. I’m a 16C. My body is big my boobs are right size as in not overly abundant.
Thanks for listening.
I do use your other patterns so I have no problem with your brand. It’s good.
Hi Suzan, our 28C-54J range includes full bust 31″-65″ (79-165 cm) and underbust 28″-55″ (72-142 cm). You can see more information on how to choose your size here: https://cashmerette.com/brasizing
If you’ve made a Cashmerette pattern before, it’s highly likely you fit into the Willowdale’s size range!
-Ayelet at Cashmerette
16C is a 38C in US and UK looks like. A 38 band is not a large band, but because of sister sizing it’s the same amount of boob as a 36D, a 34DD/E, a 32 DDD/F or a 30DDDD/G (US cup sizing, Uk would be D, DD, F, FF). It looks like you fit in the size range so that’s good news! Anyway as you know RTW size doesn’t matter too much re: sewing size, so the chart provided is prob best at least to start. Plus who is the same cup size in every RTW bra? So, chart.
Oh and AU D, DD, E, F!
Thank you A LOT for this extensive guide. I just sewed up my first toile of the willowdale. Should have read this guide before 😄 But i was expecting to have to make several muslins, so all’s fine 😍