Today I’m showing you how to grade between sizes on the Randolph Skirt, the asymmetric wrap skirt sewing pattern from my new book, “Sewing the Curve”.
In “Sewing the Curve,” I cover everything from the very basics through to the five core skills of sewing, and then, how to actually sew your first garments with the help of 6 brand new Cashmerette patterns in sizes 12-32, including the Randolph Skirt.
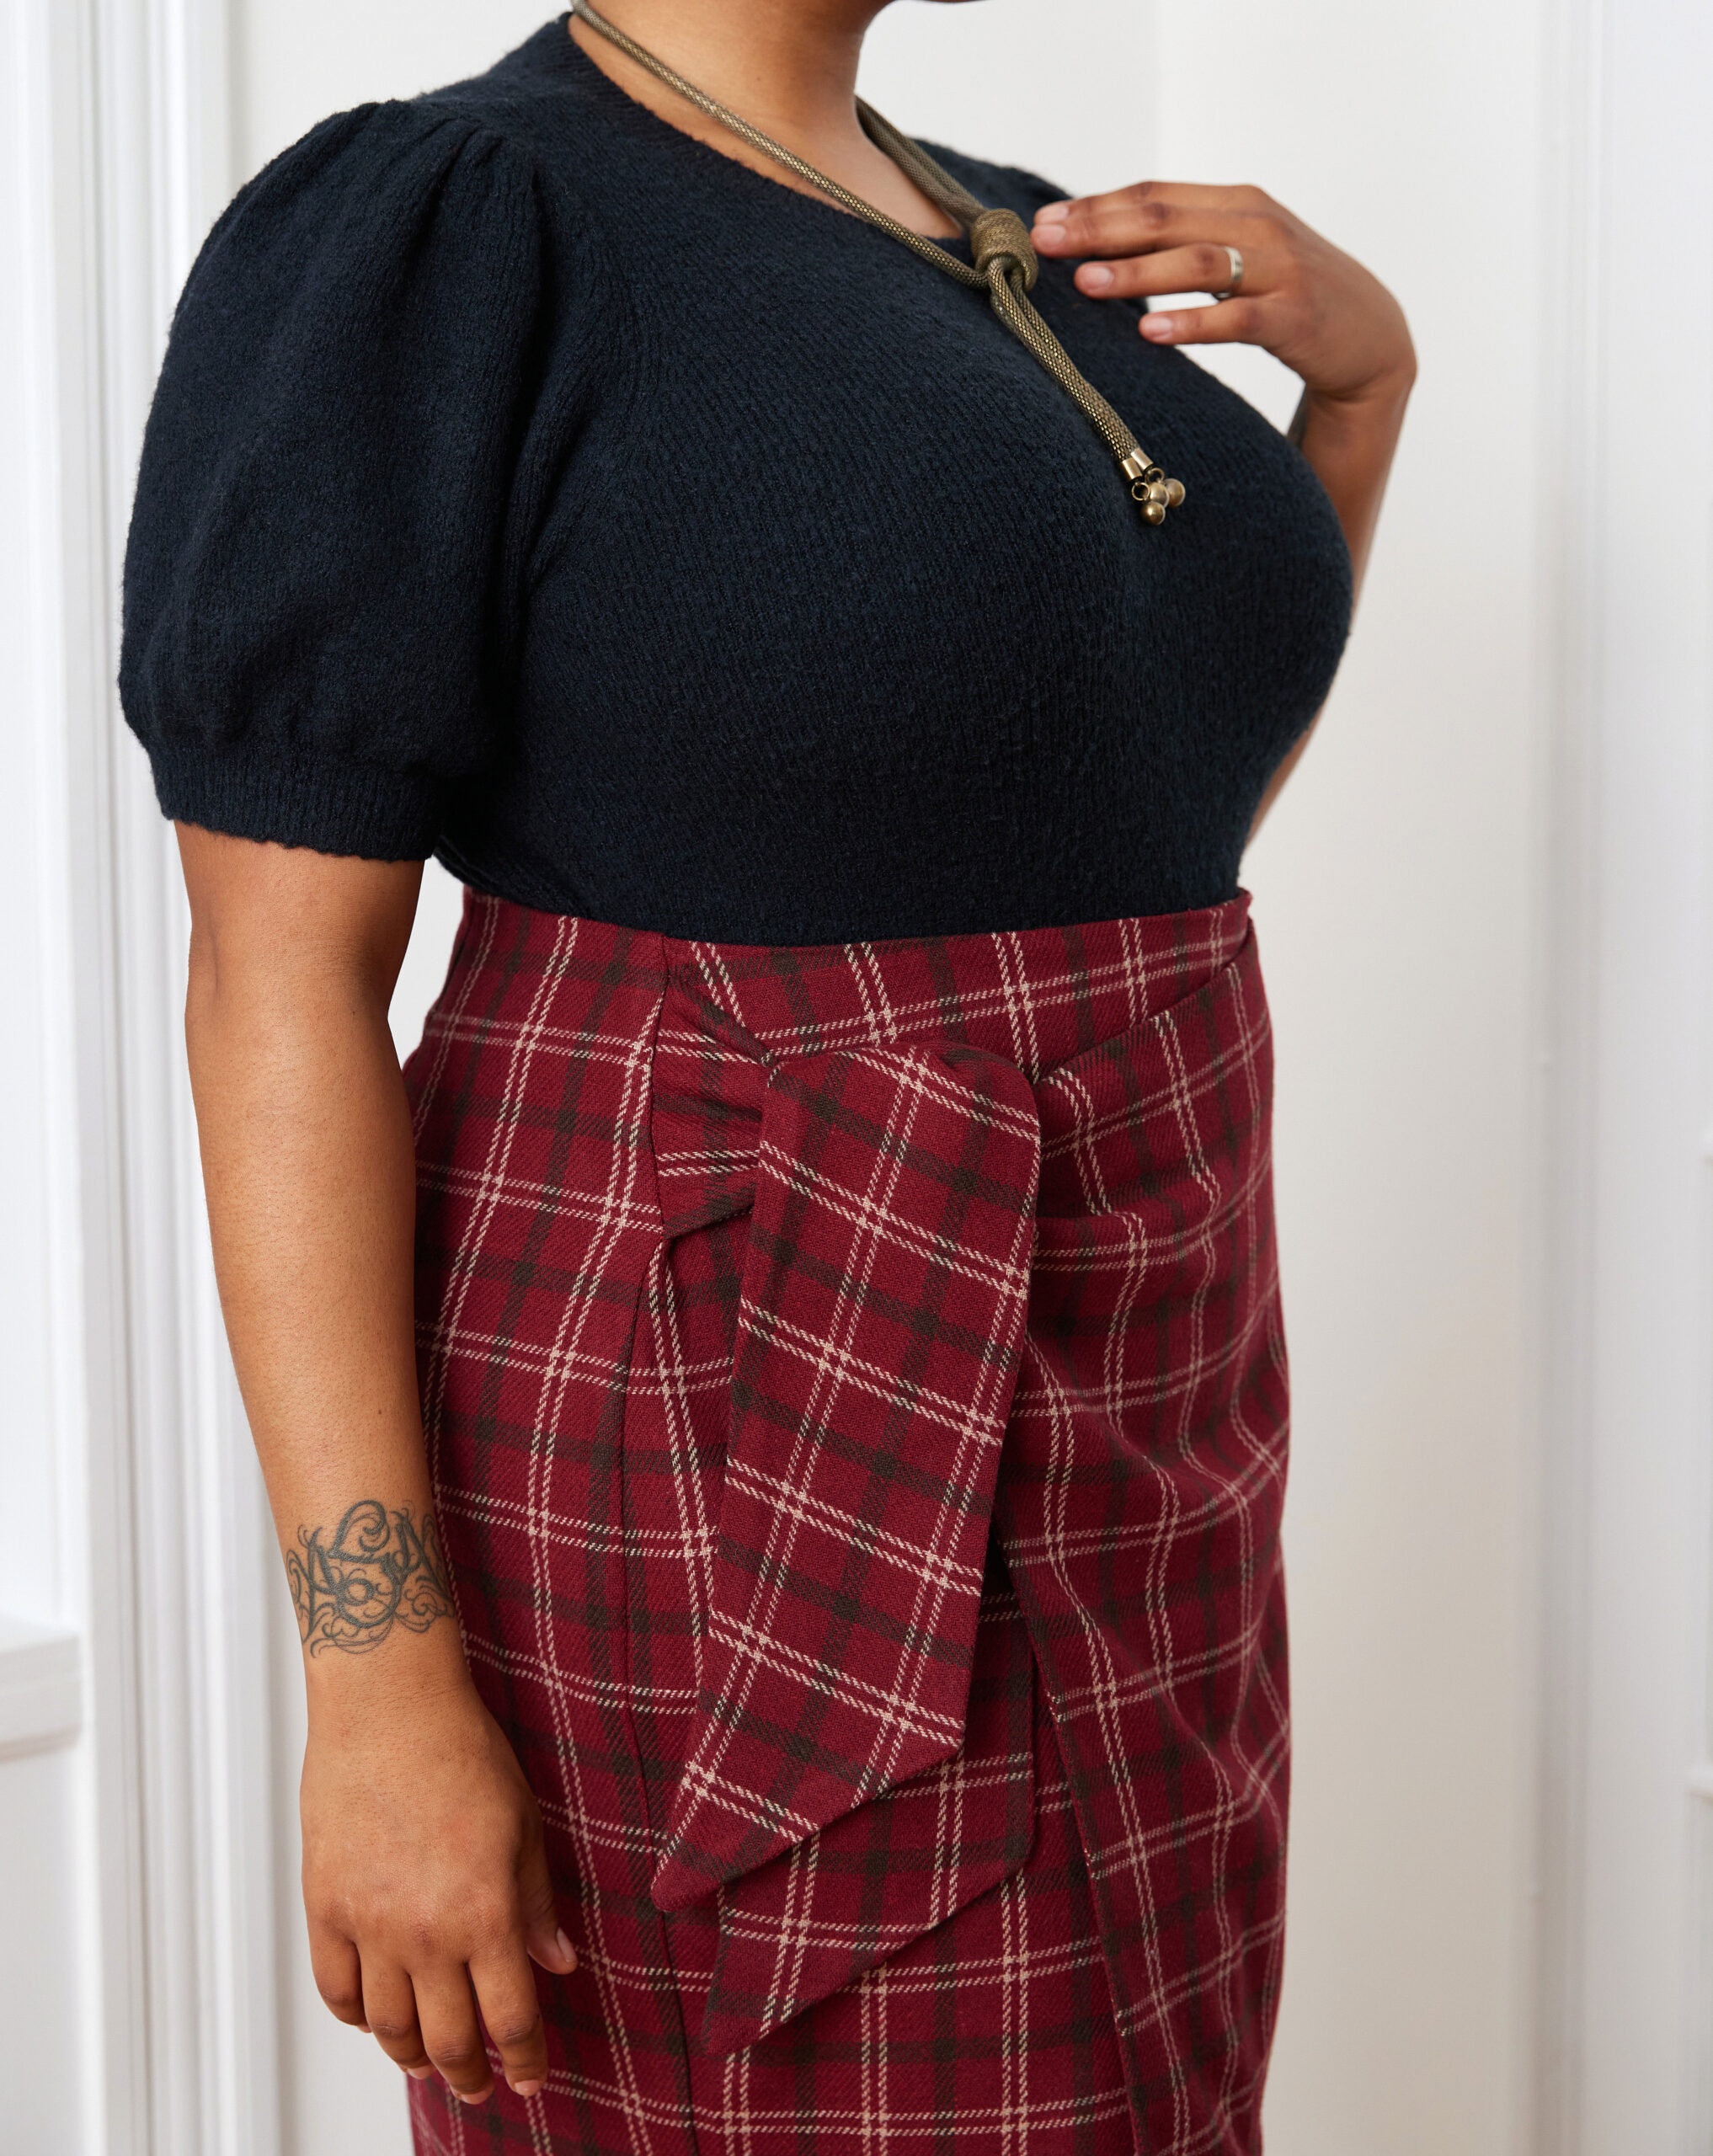
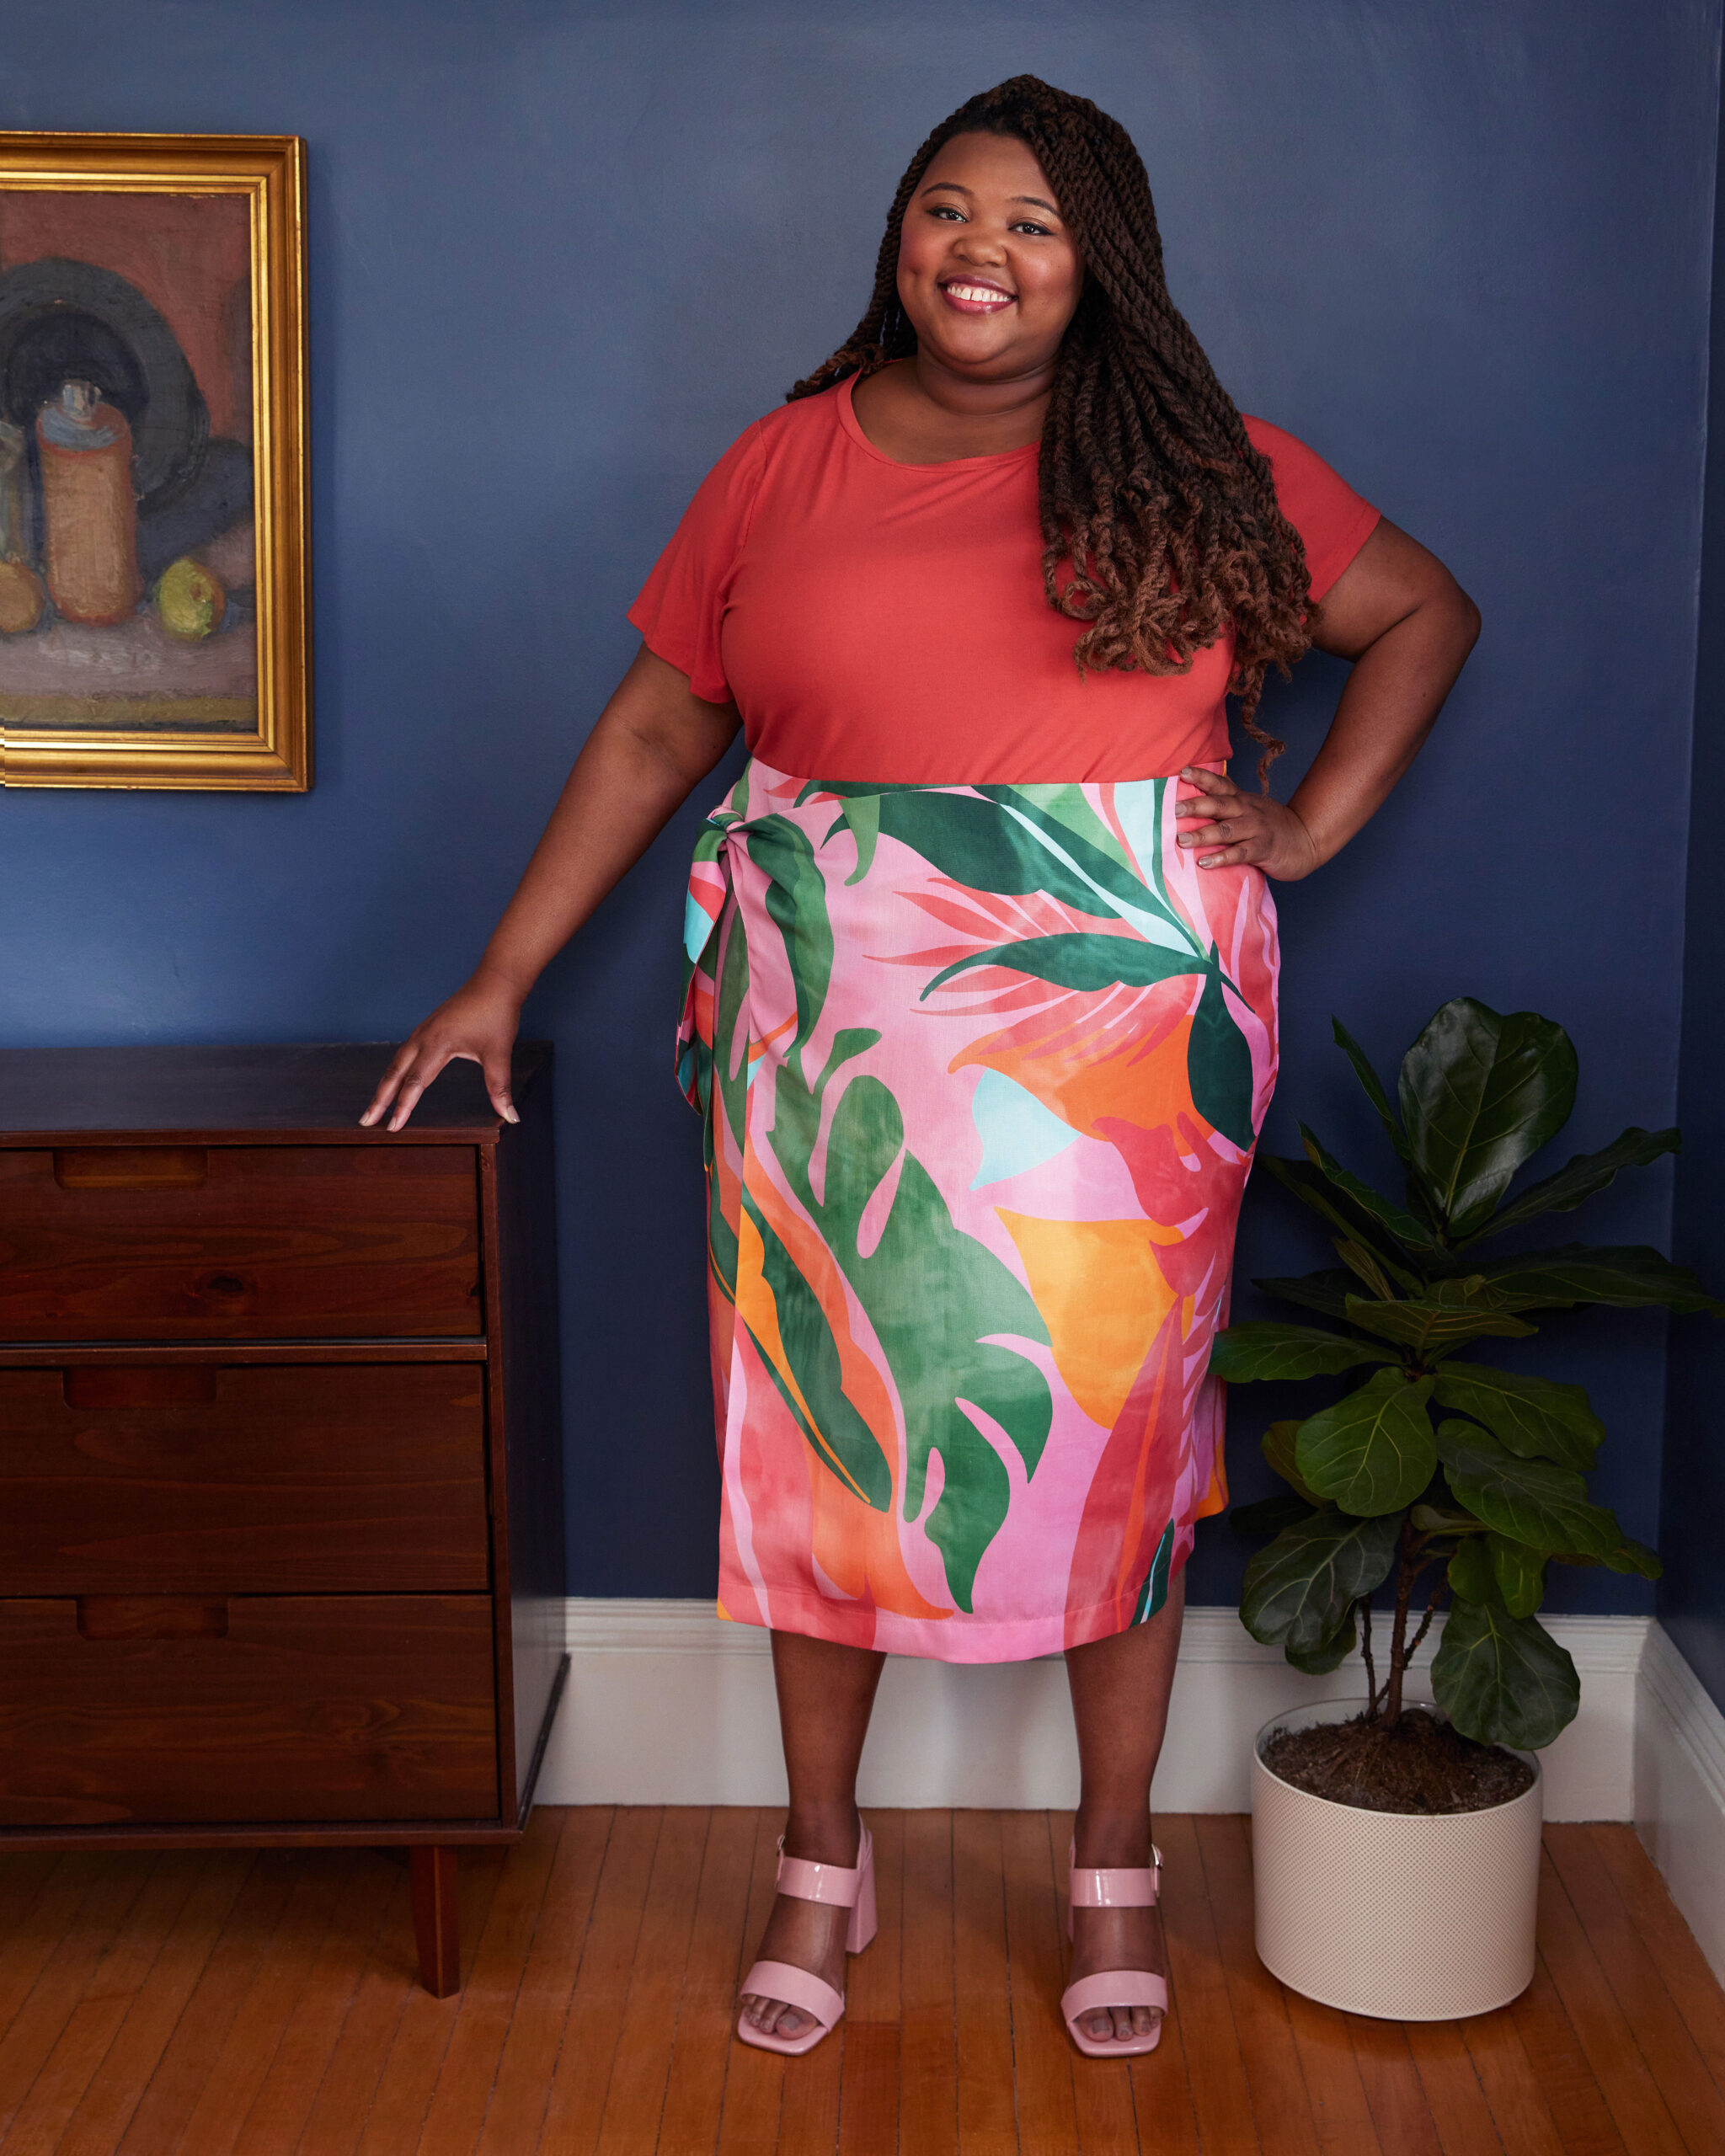
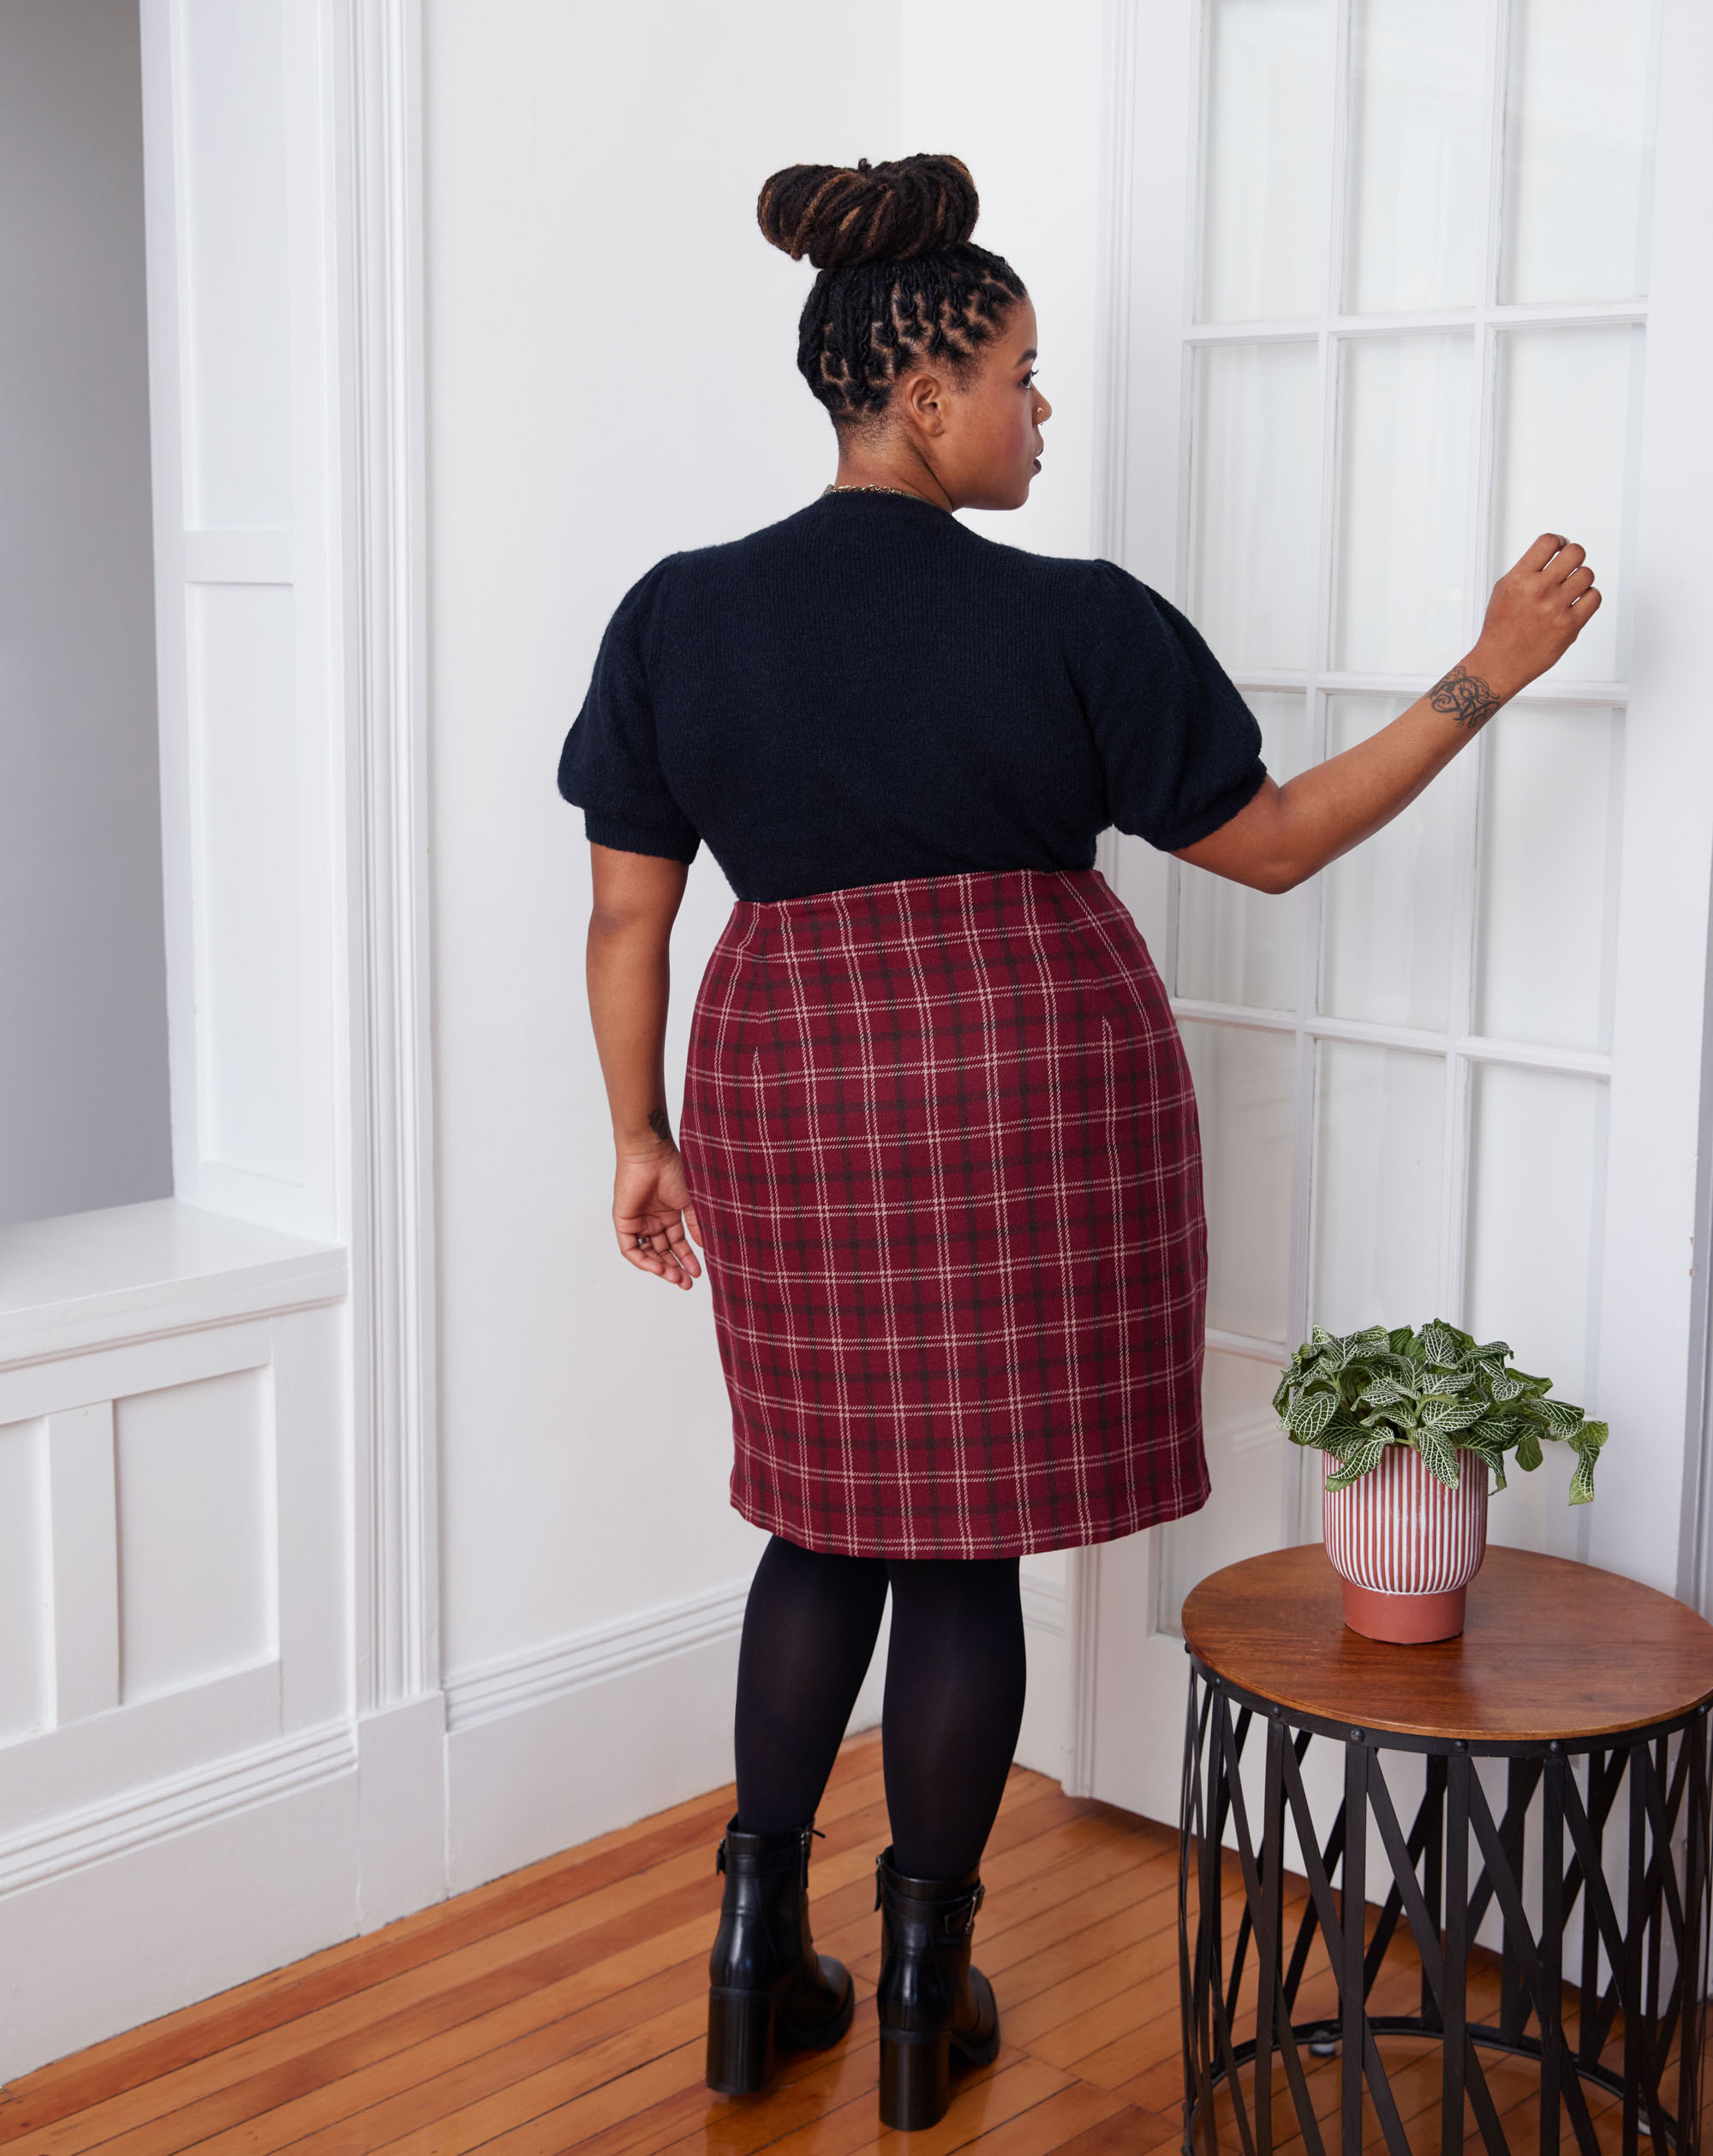
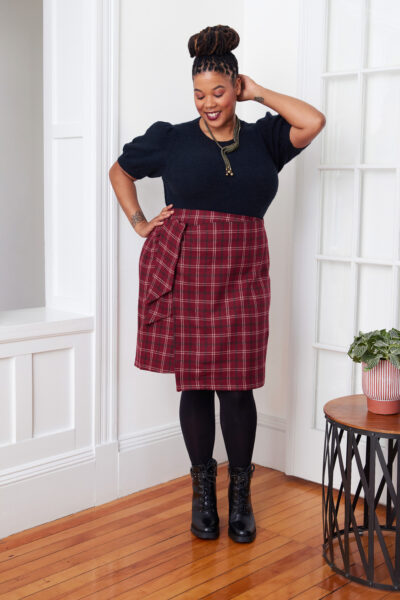
The Randolph is a chic and easy-to-wear woven wrap skirt with an asymmetric drape and chunky tie. The Randolph features a hidden button that will keep you extra secure—no need to grapple with your wrap skirt on a windy day! The darts in the back give great shaping and the asymmetric drape gives it a modern and unique shape.
But because of the asymmetric nature of the Randolph and its grown-on tie, there are a few tricks to follow when grading this pattern. Whether you’re grading up or down, I show you what to do on each pattern piece. So let’s get into it!
What is grading between sizes?
If you’re looking at the size chart and your measurements fall in multiple sizes, fear not! You can grade between sizes to create your own custom size that will give you the best fit for your body. This is extremely common and most people need to grade between sizes on most patterns; very rarely do people’s measurements fall exactly in one size.
In short, when grading between sizes, you just draw a line between the notches at the different points on the pattern where you need different sizes. We have tons more info and tutorials about grading between sizes over here, or you can check out pages 54 and 55 of “Sewing the Curve” to learn more.
How do I grade between sizes on the Randolph Skirt?
If you’re grading from a larger waist size to a smaller hip size (such as a 24 waist to a 20 hip), you’ll want to follow these steps.
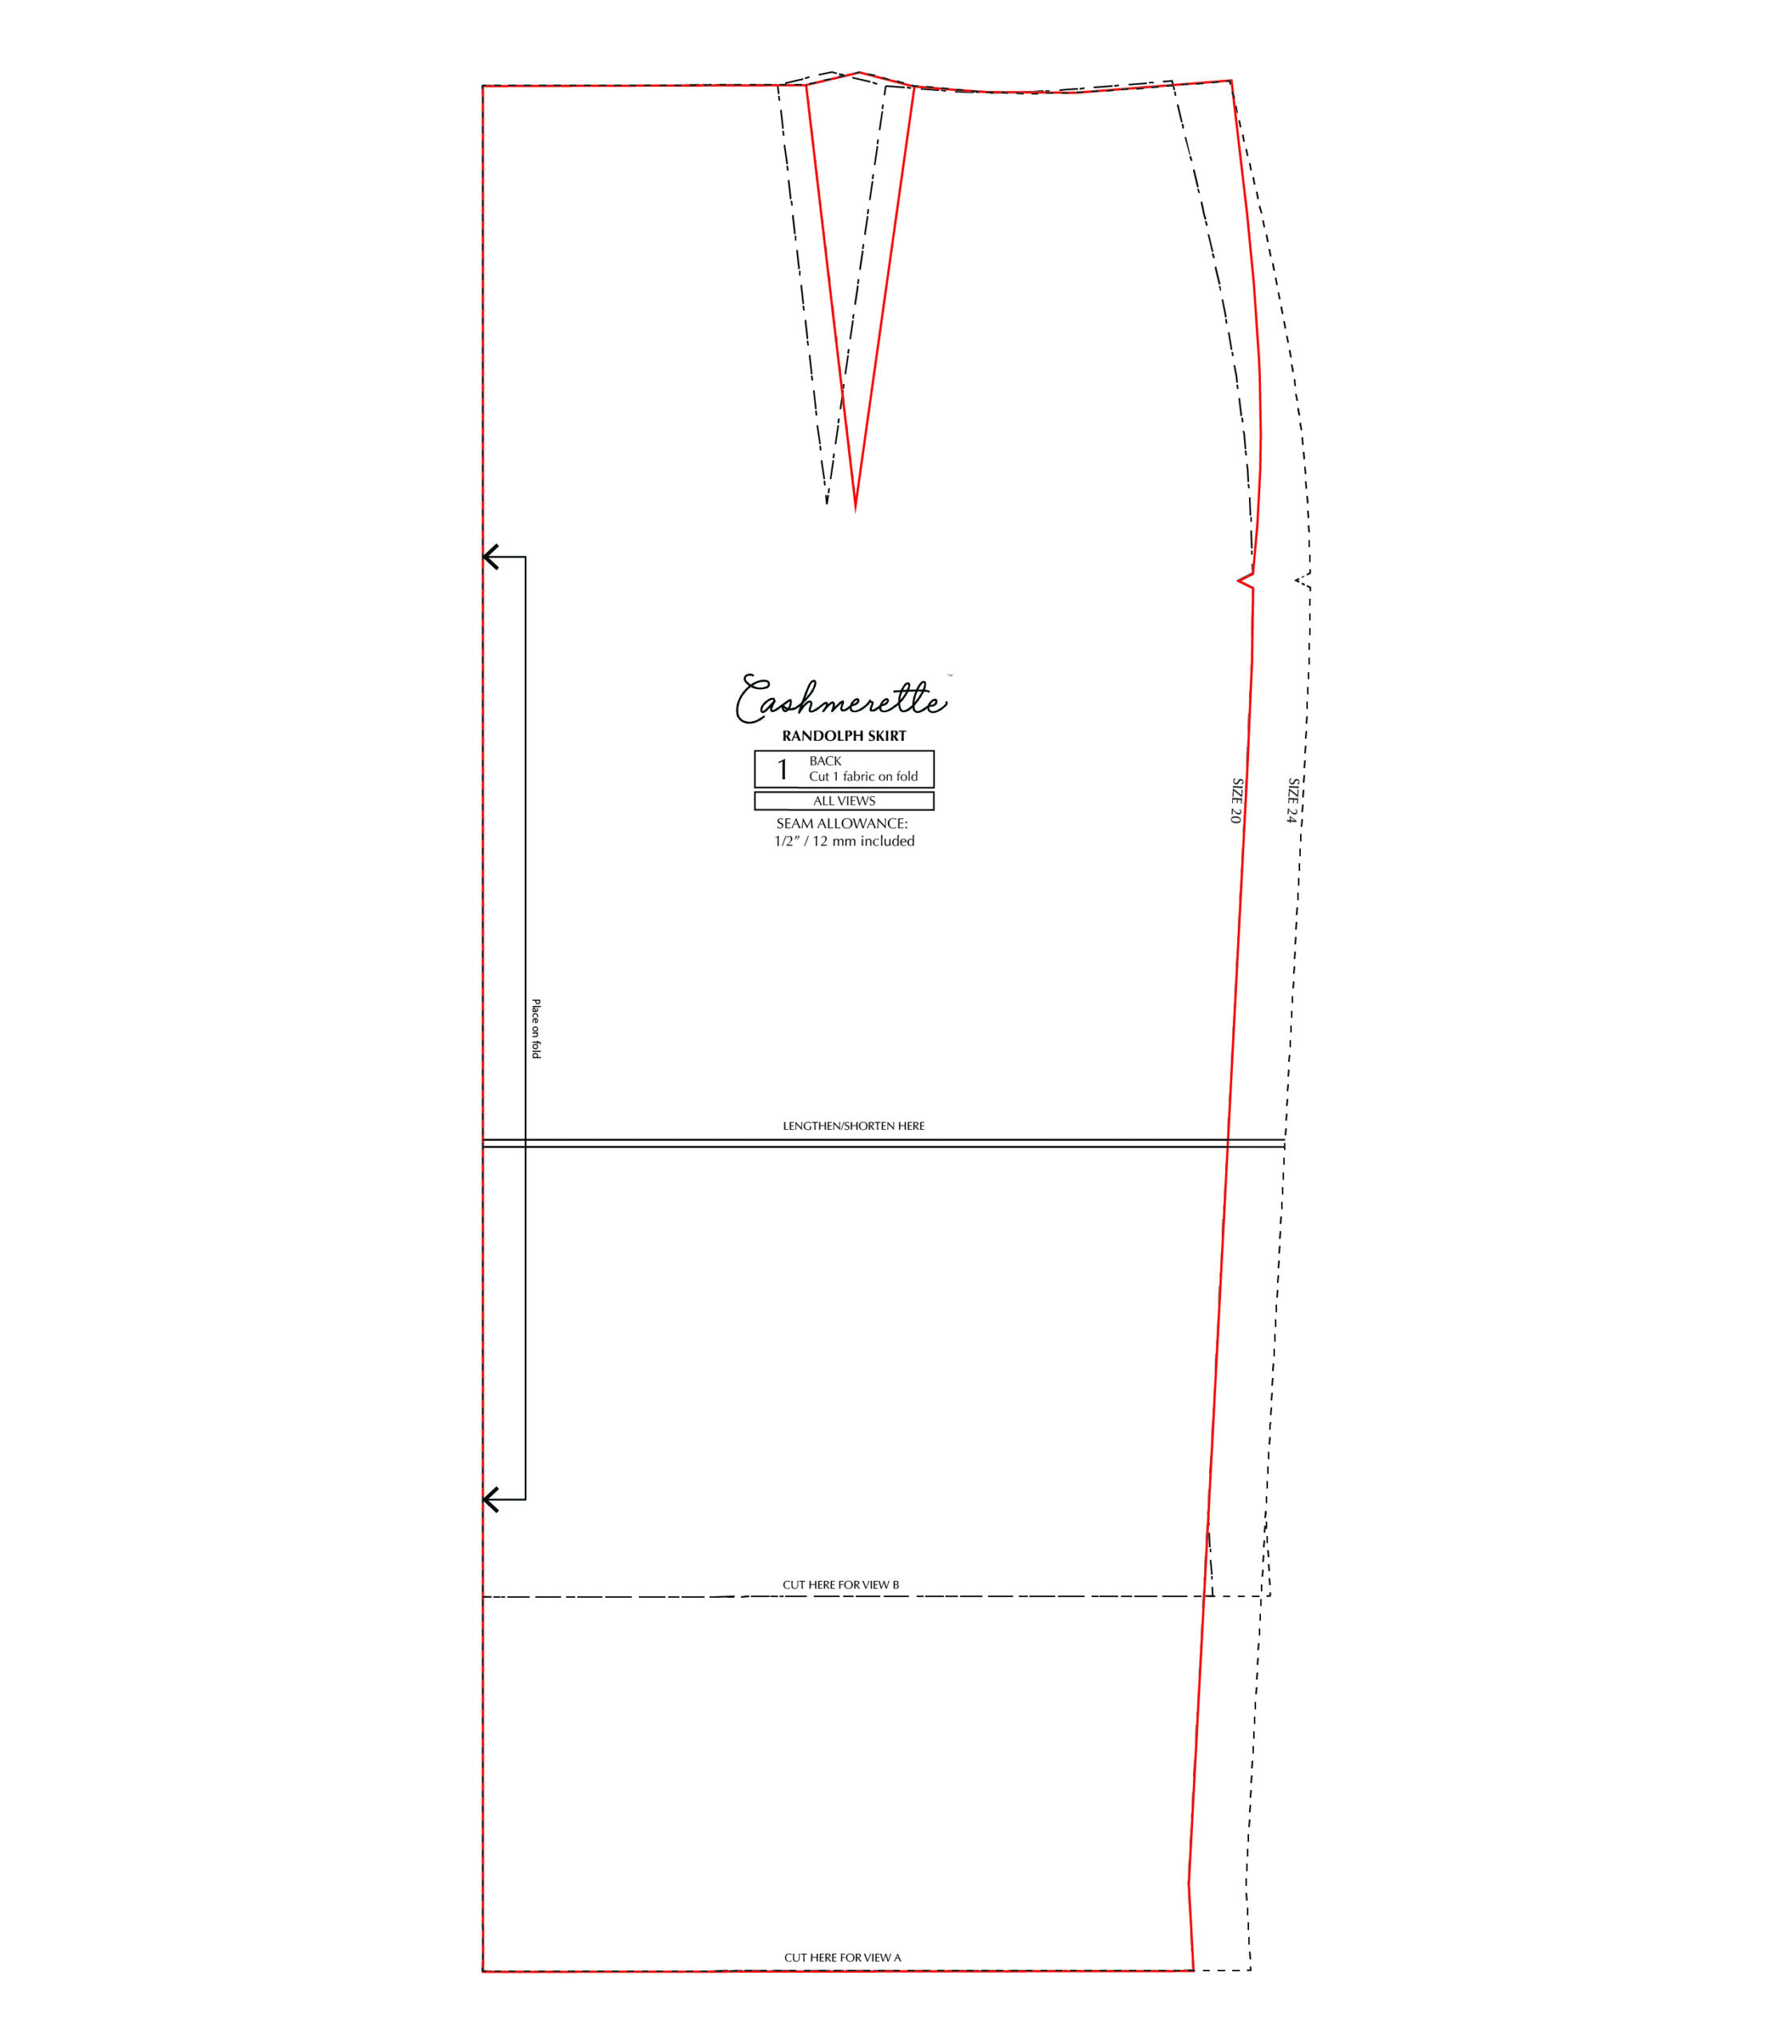
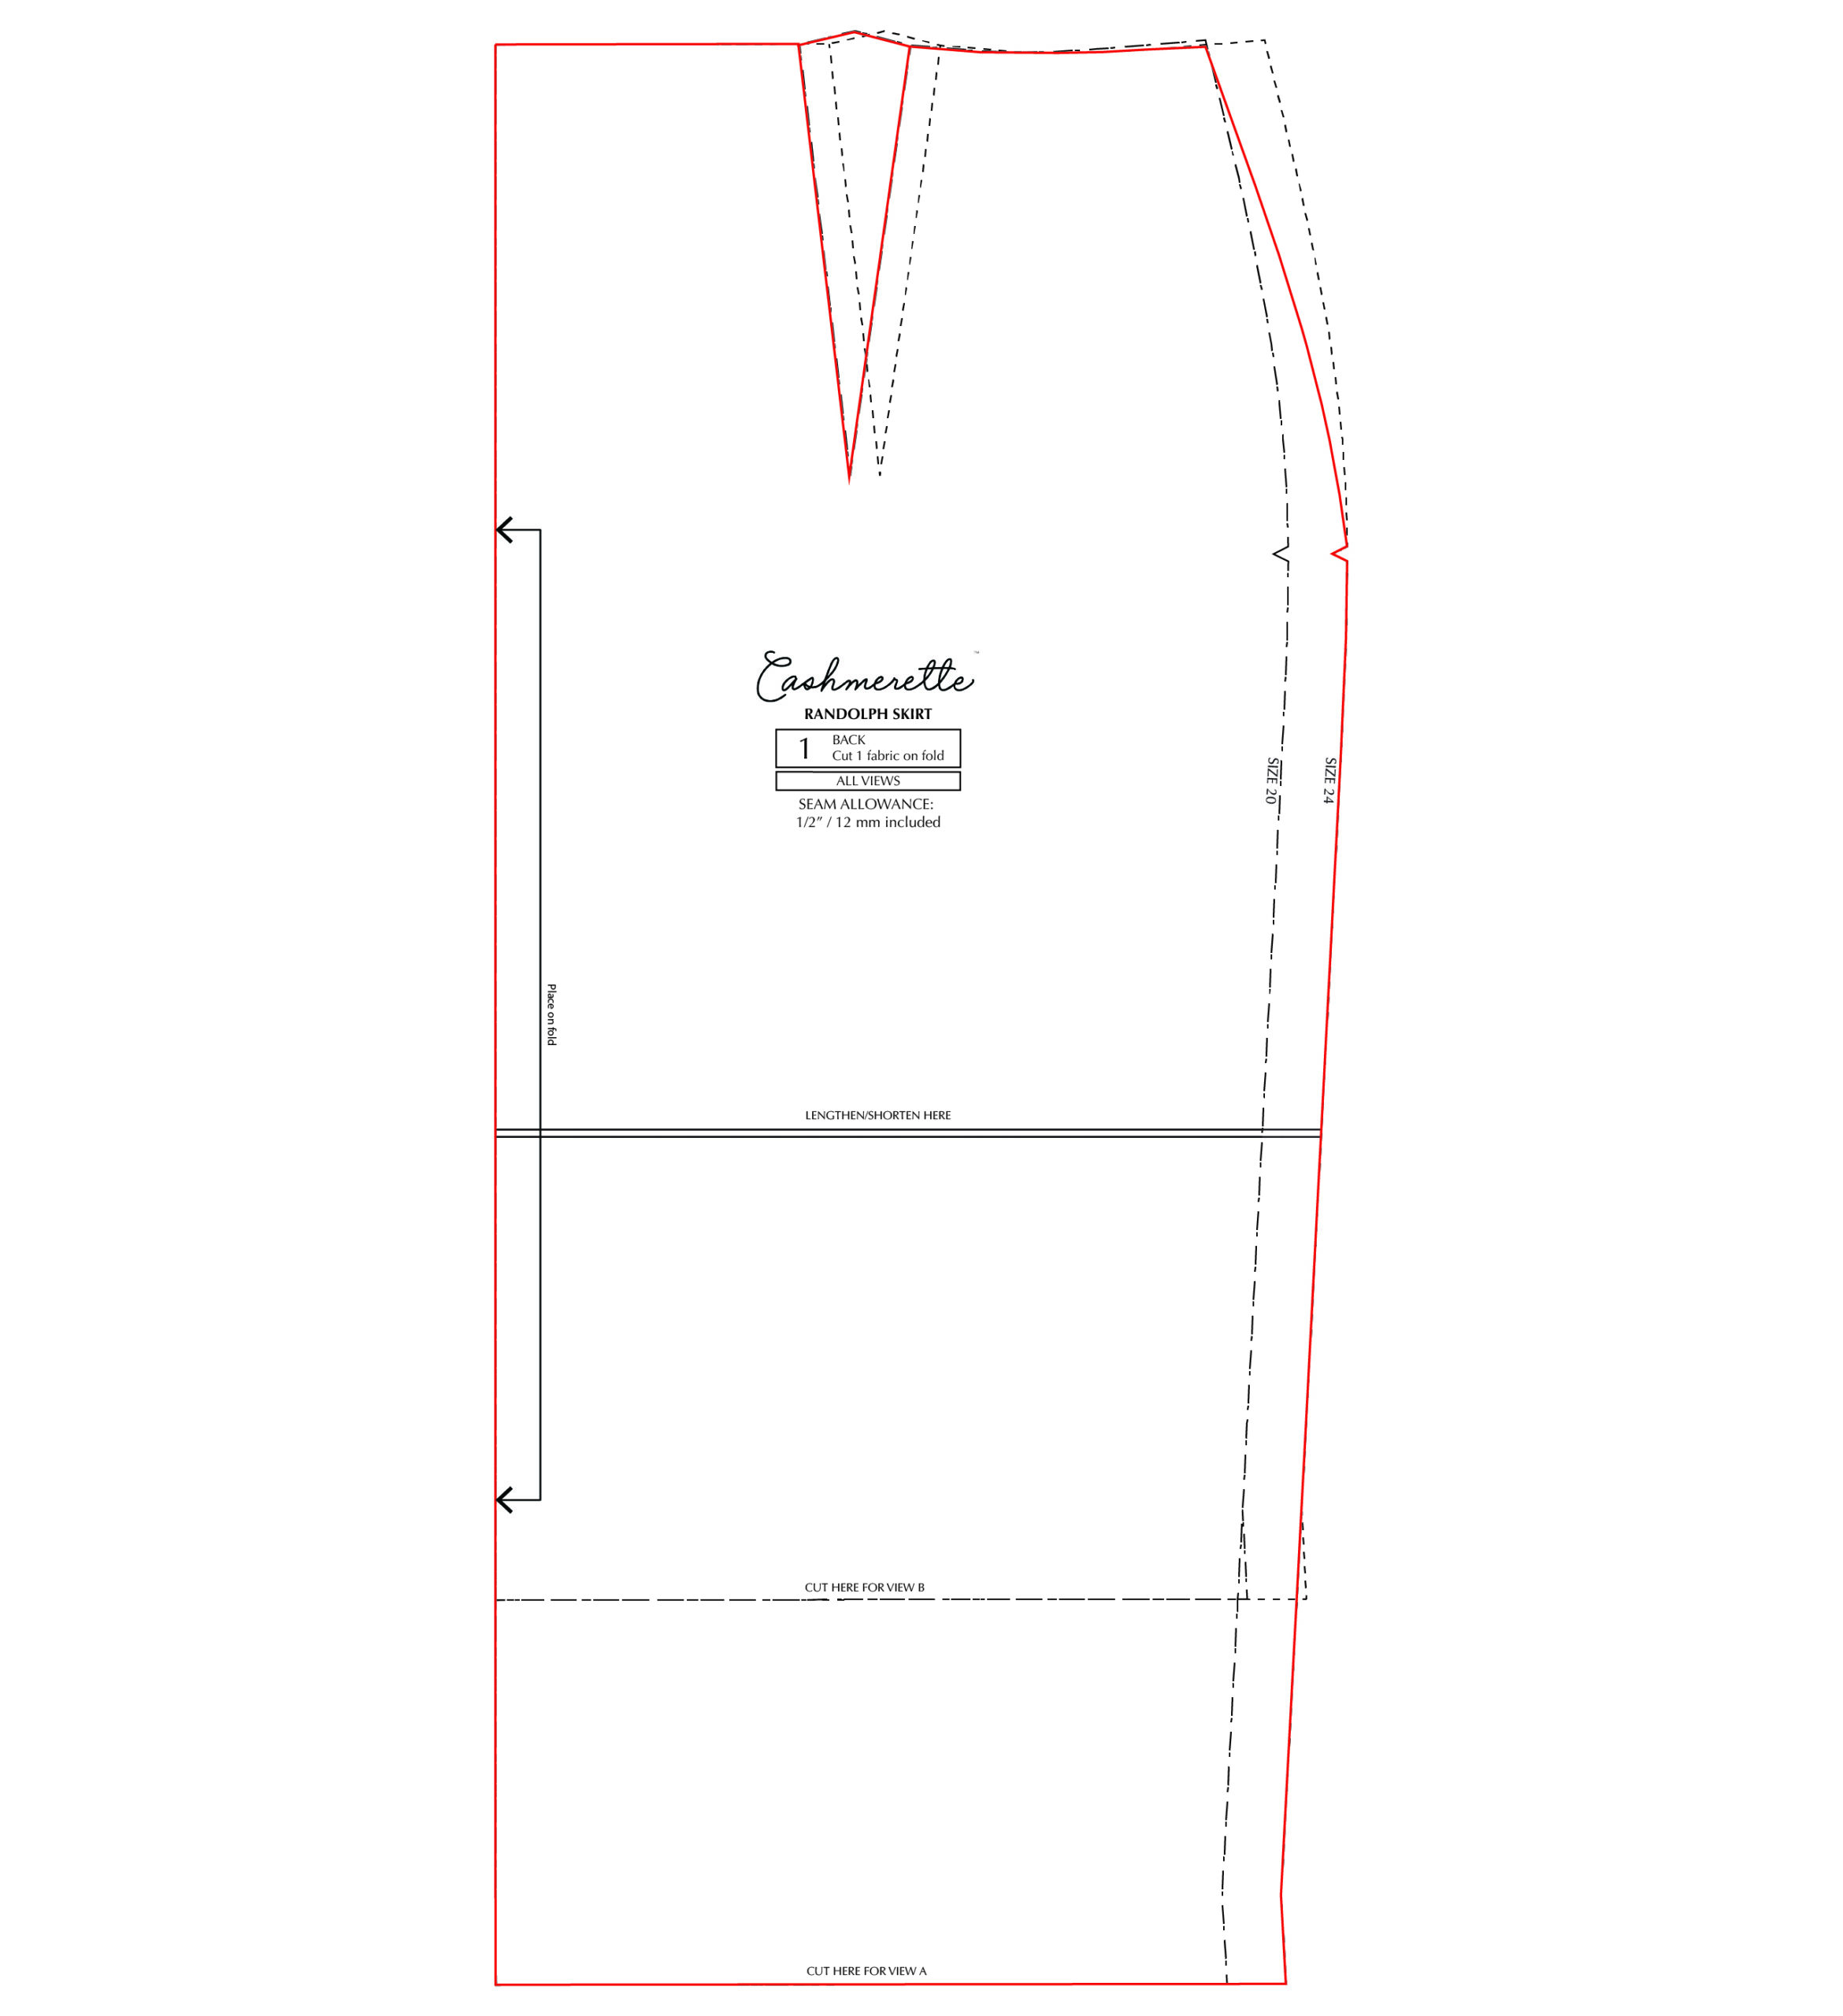
Back
For the back piece (piece #1), grade as per usual between waist (size 24) and hip notch (size 20), and use the waist dart based on waist (size 24) .
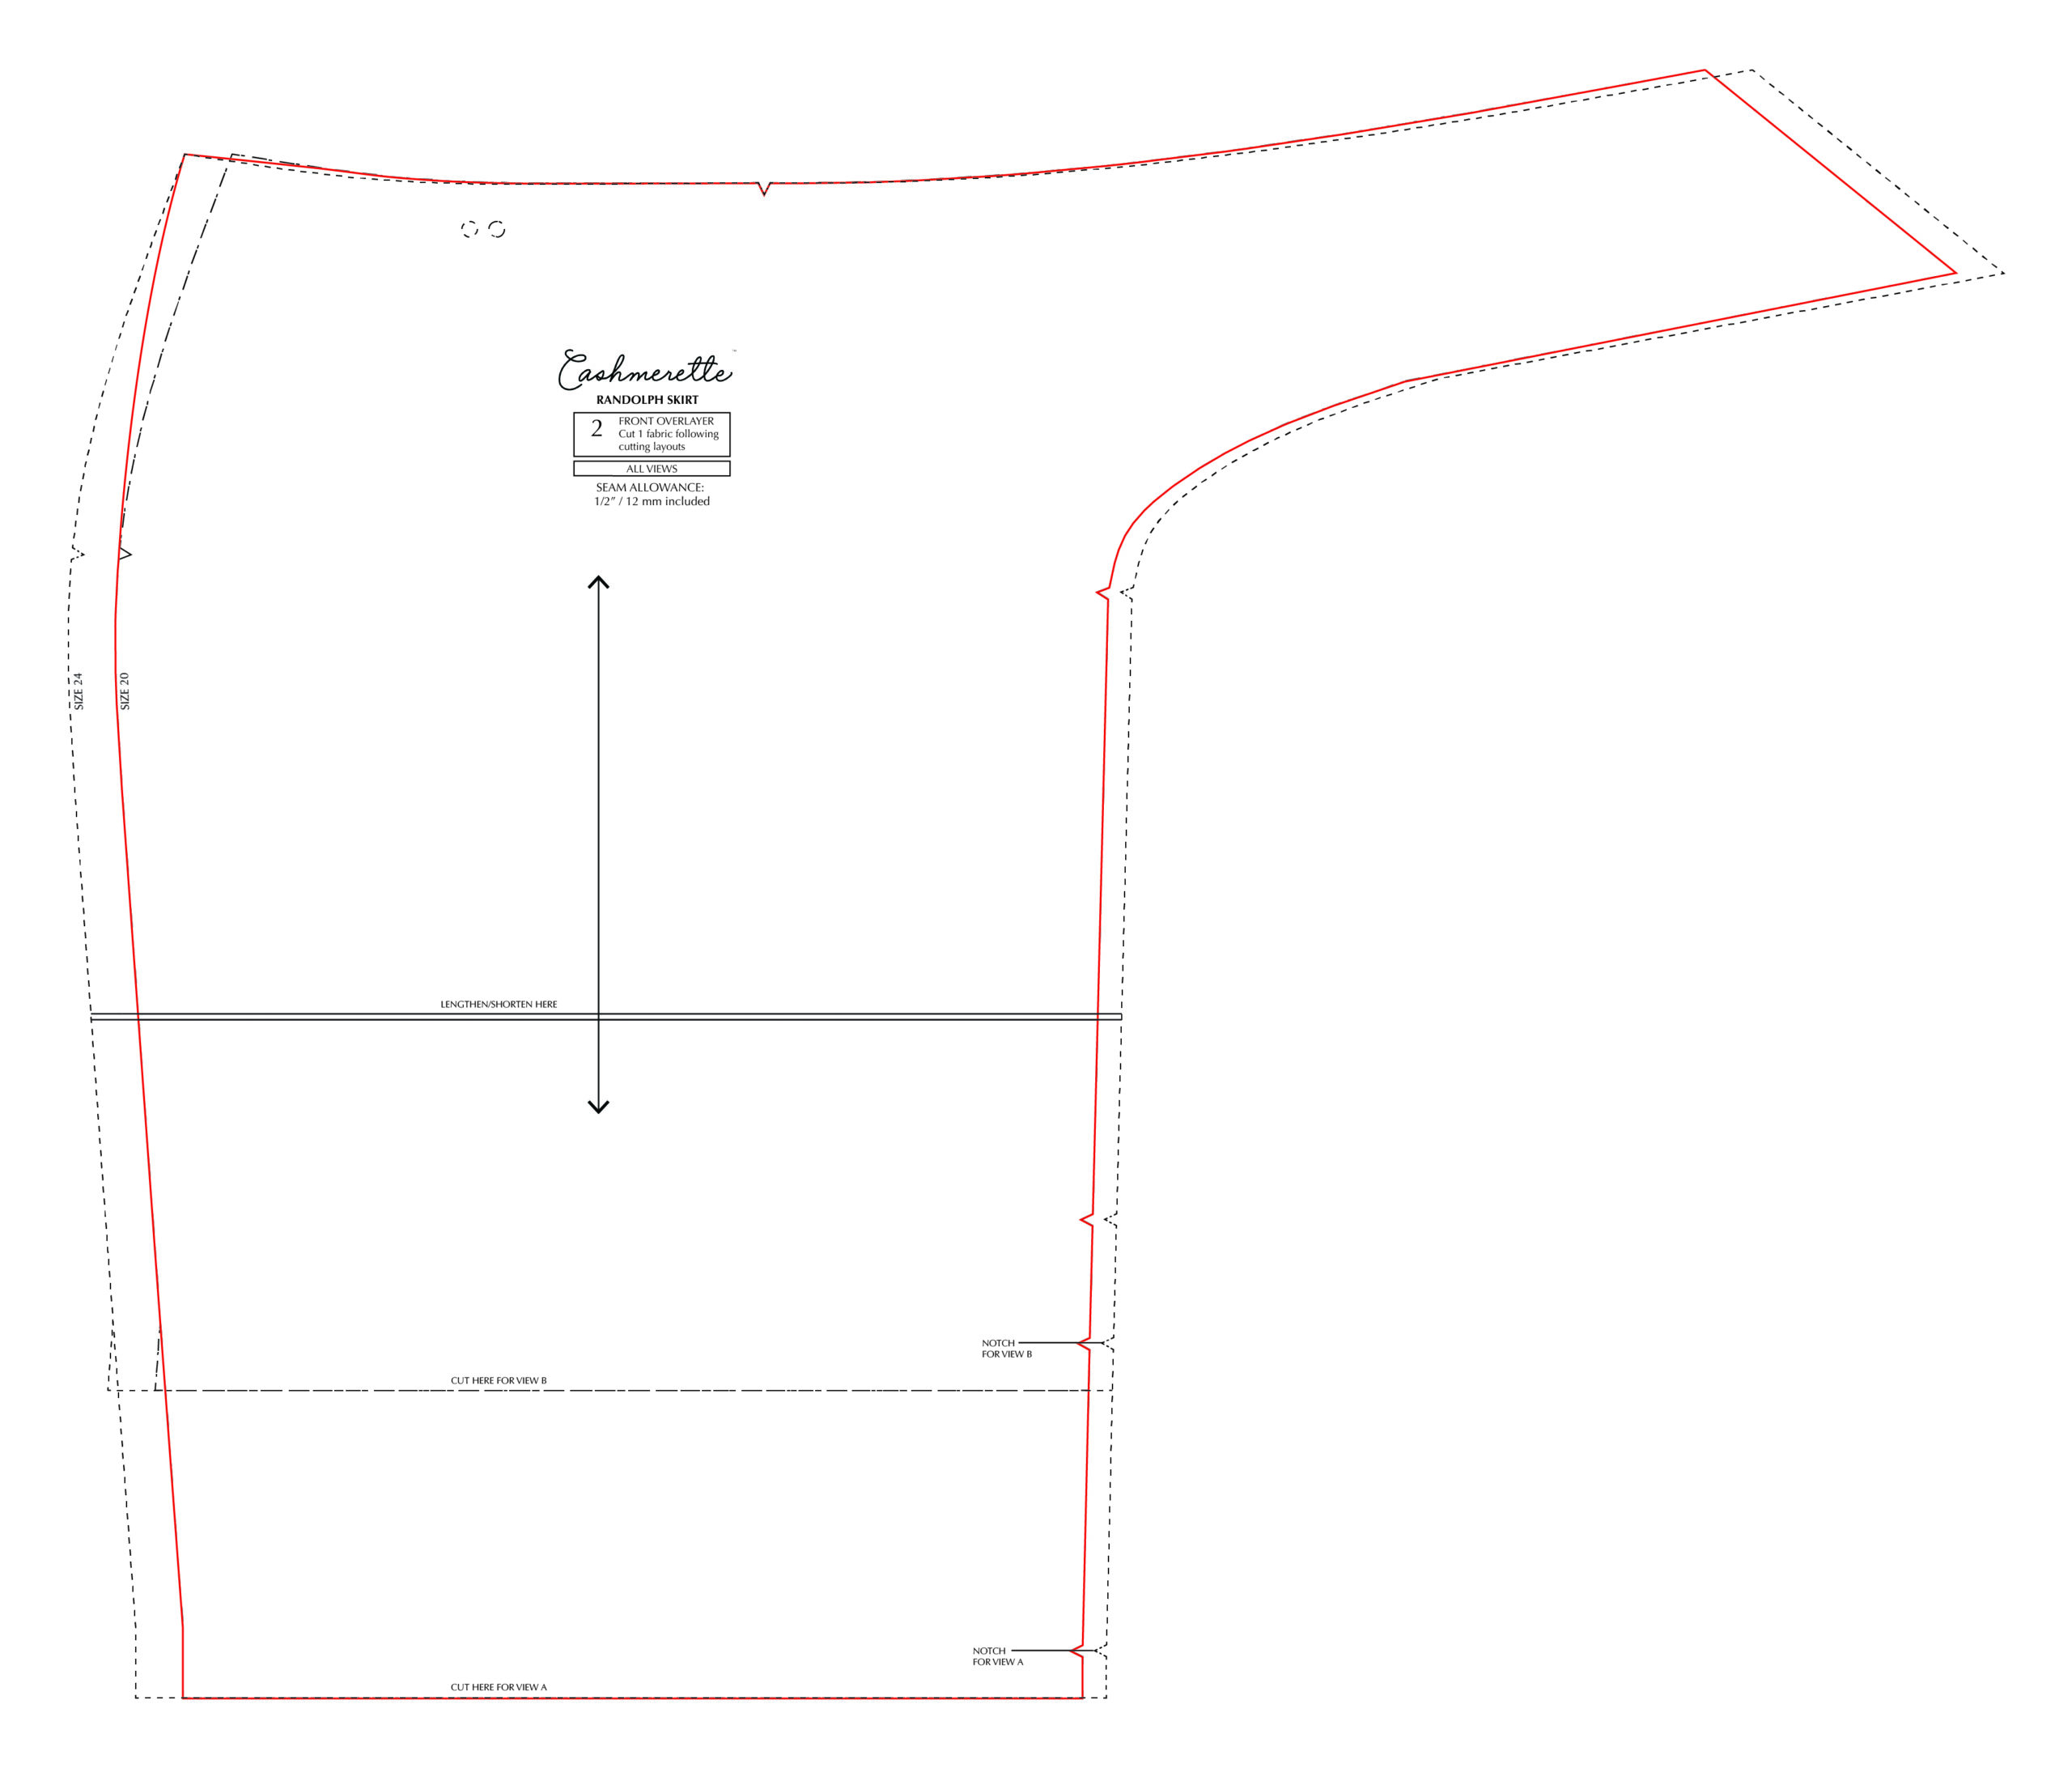
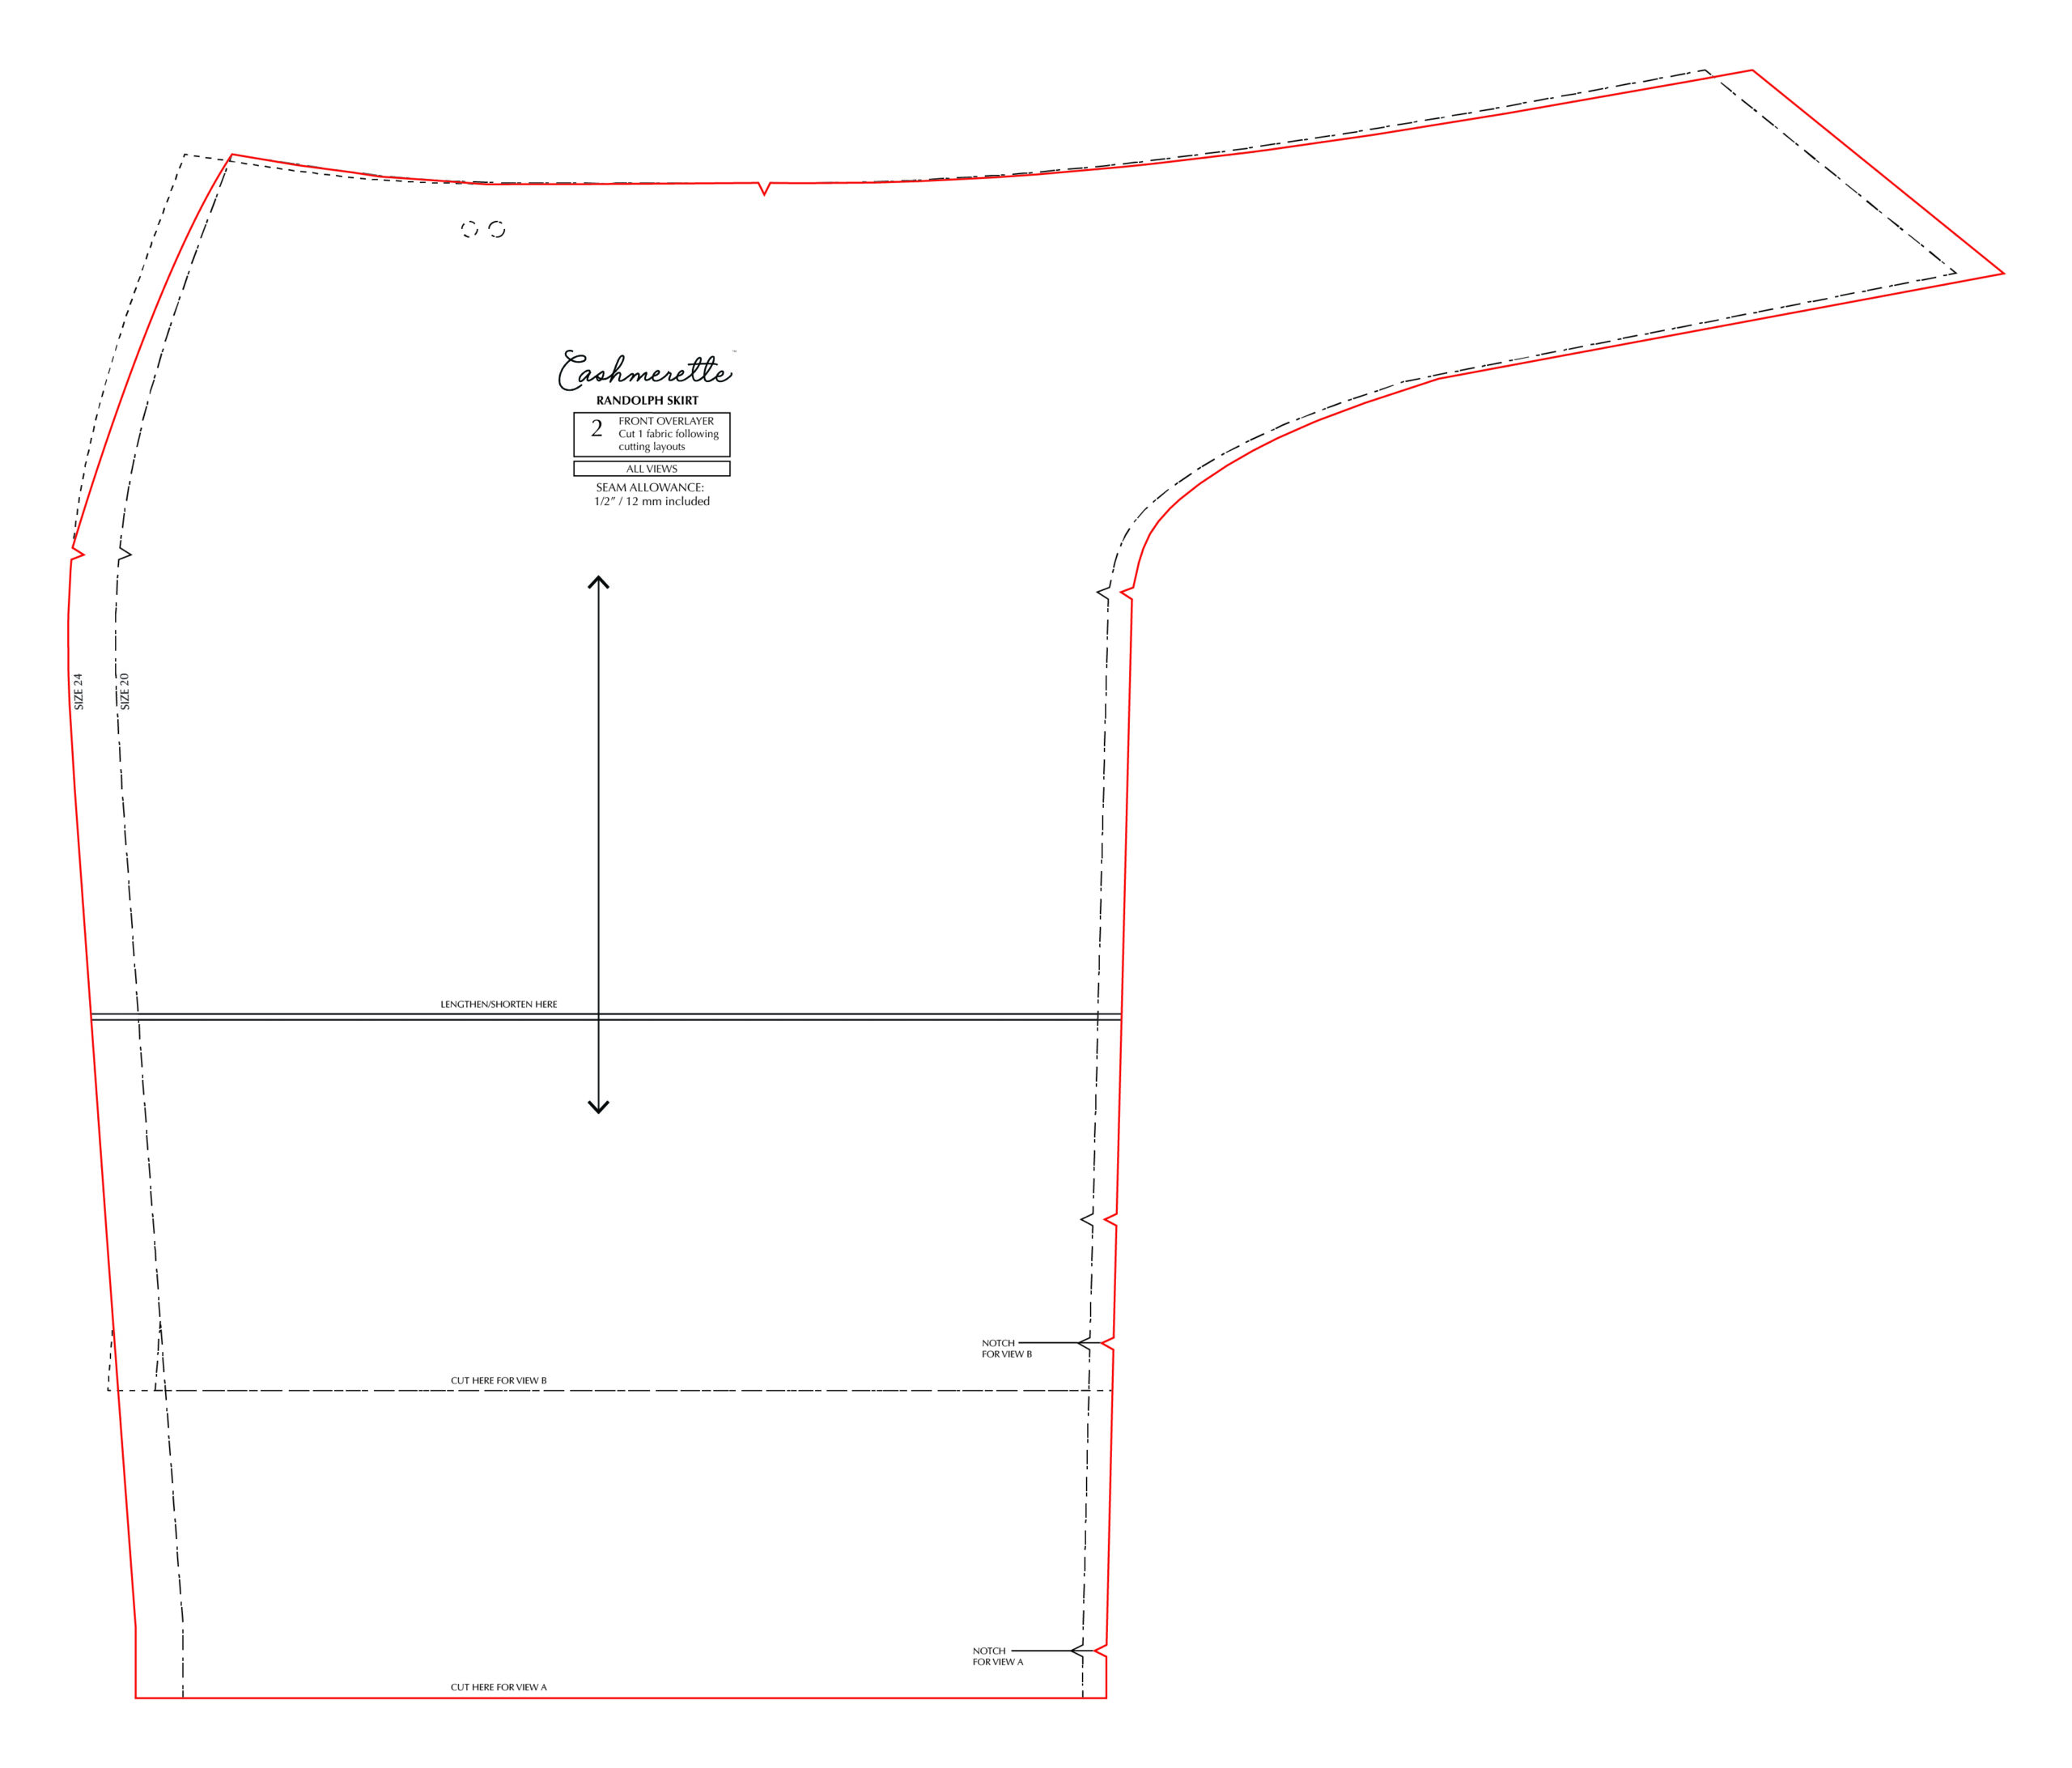
Front overlayer
For the front overlayer (piece #2), grade the left side as usual between waist (size 24) and hip notch (size 20). For the tie, cut to hip size (size 20).
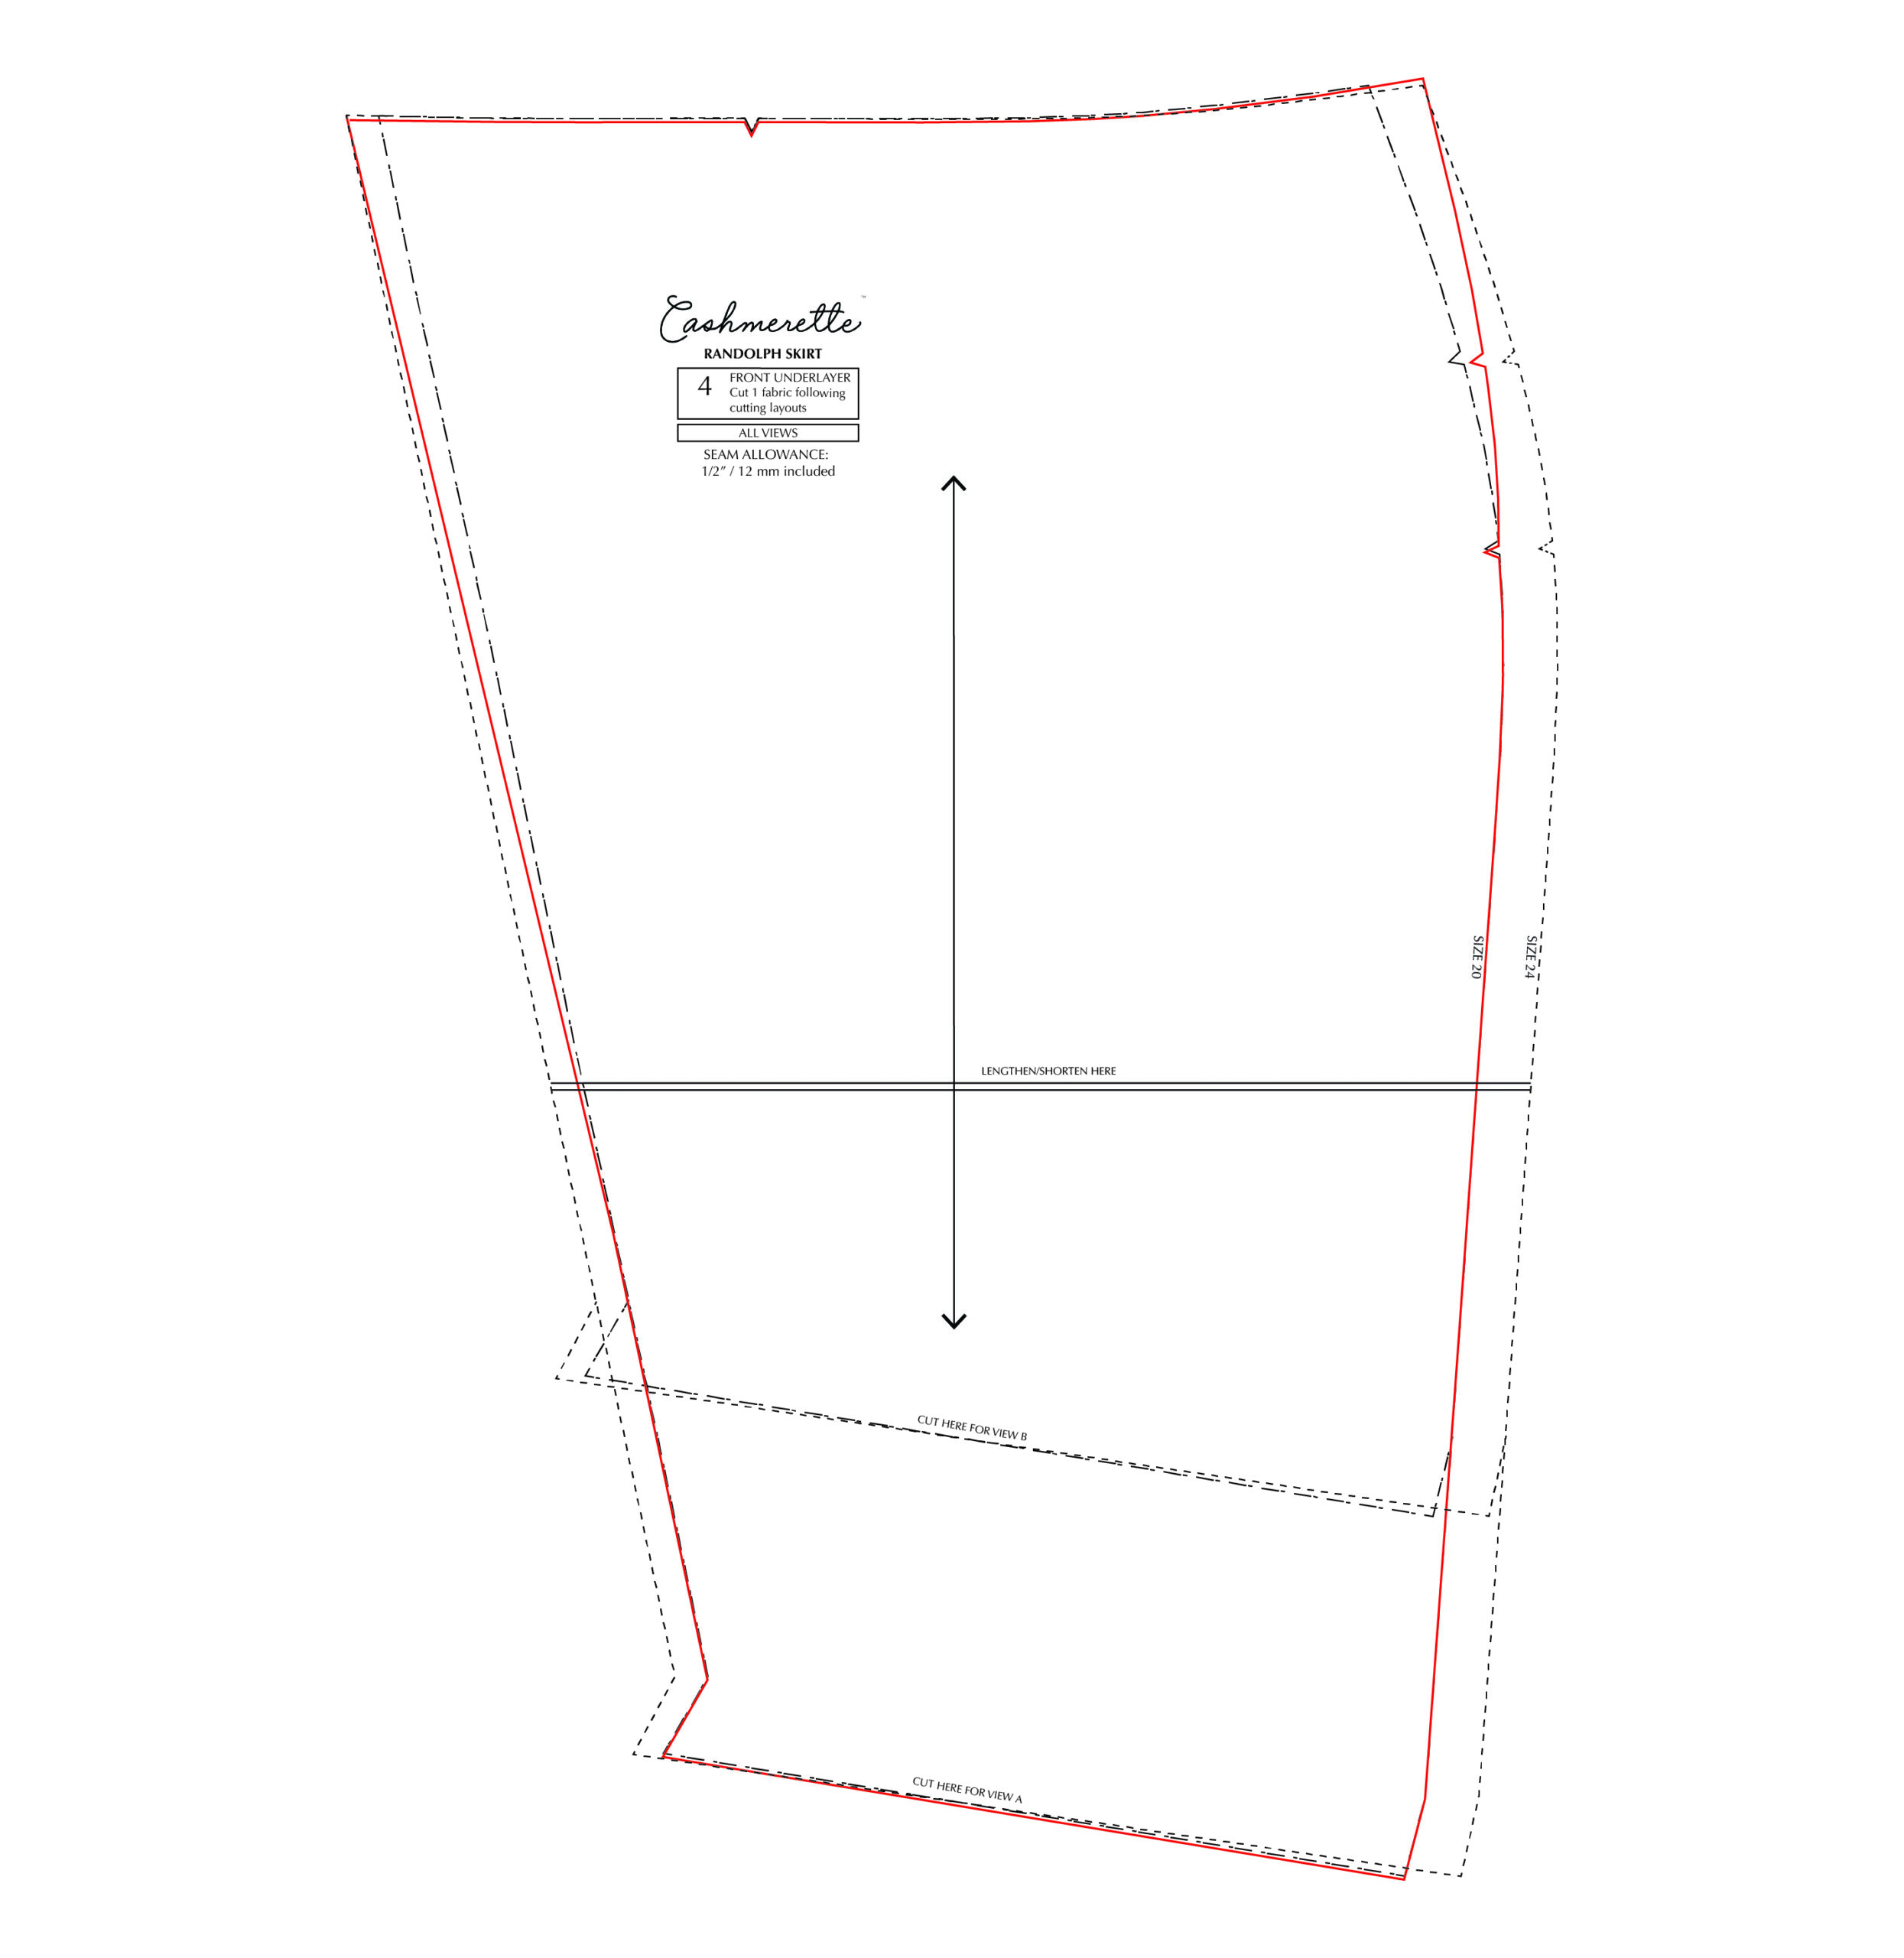
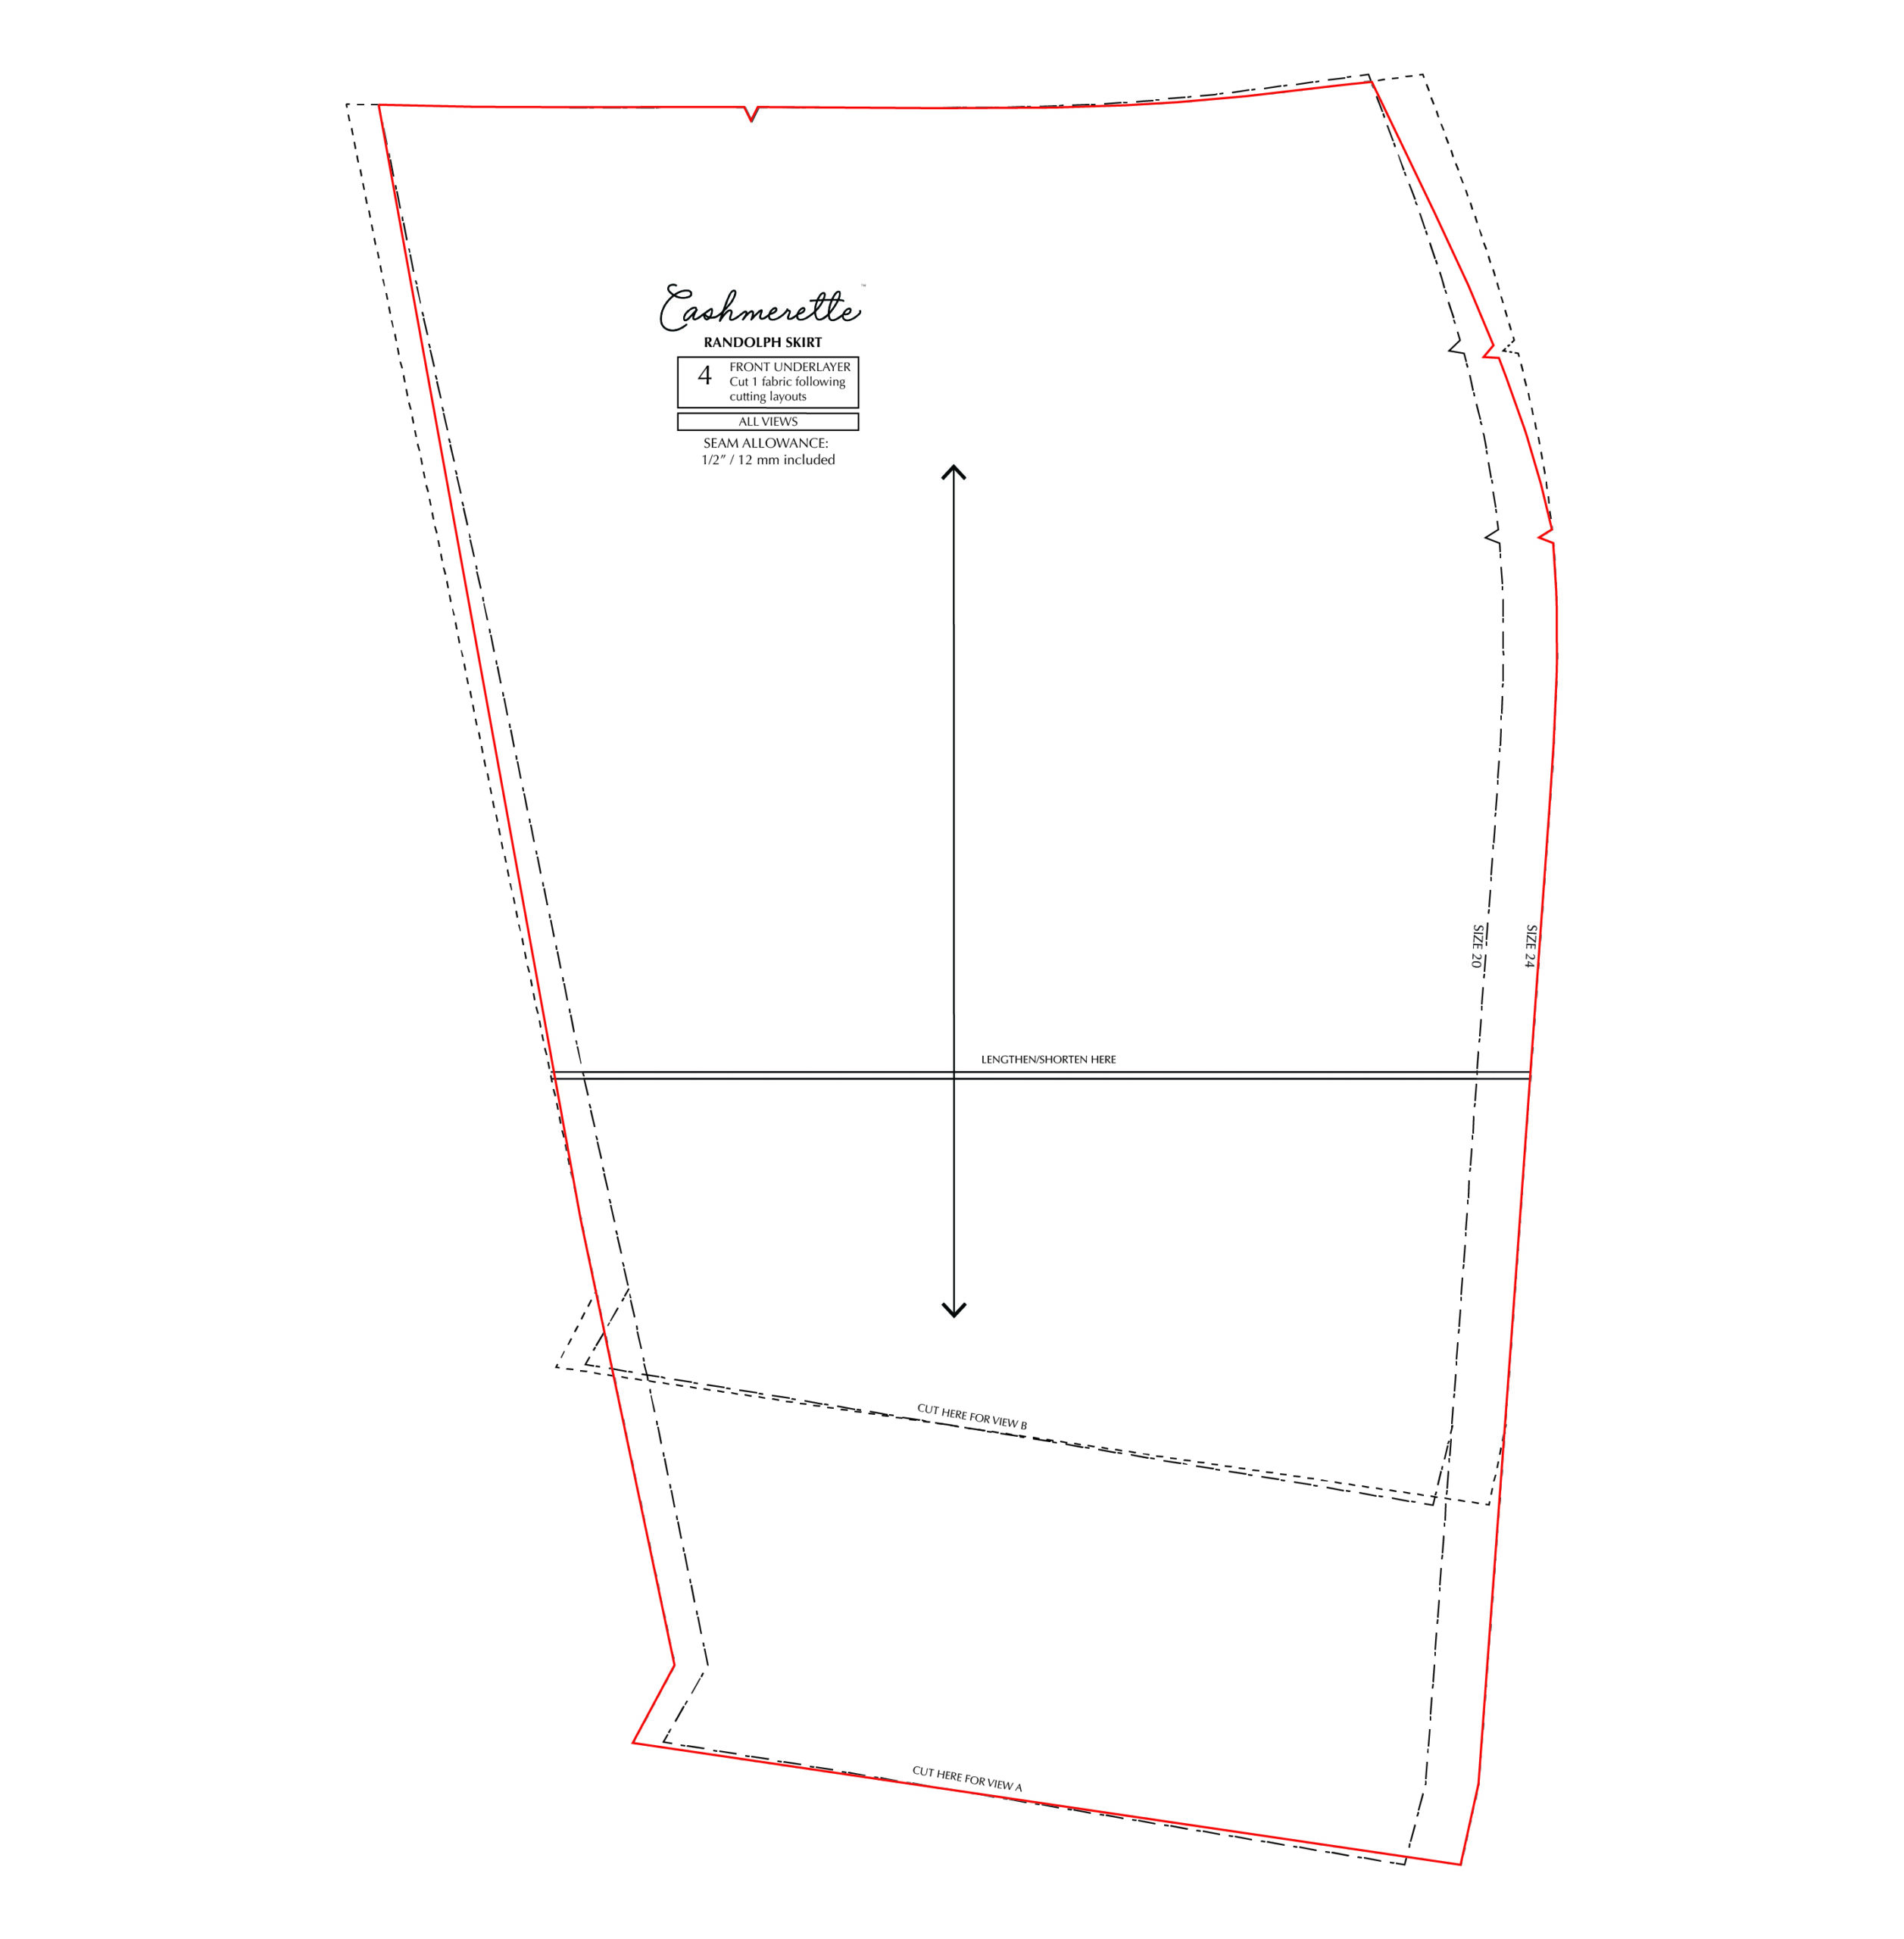
Front underlayer
For the front underlayer (piece #4), grade right side as usual between waist (size 24) and hip notch (size 20) and make sure you mark new position of tie notch.
For the inner edge, grade in a straight line between the waist size (size 24) at the top and the hip size (size 20) at the bottom.
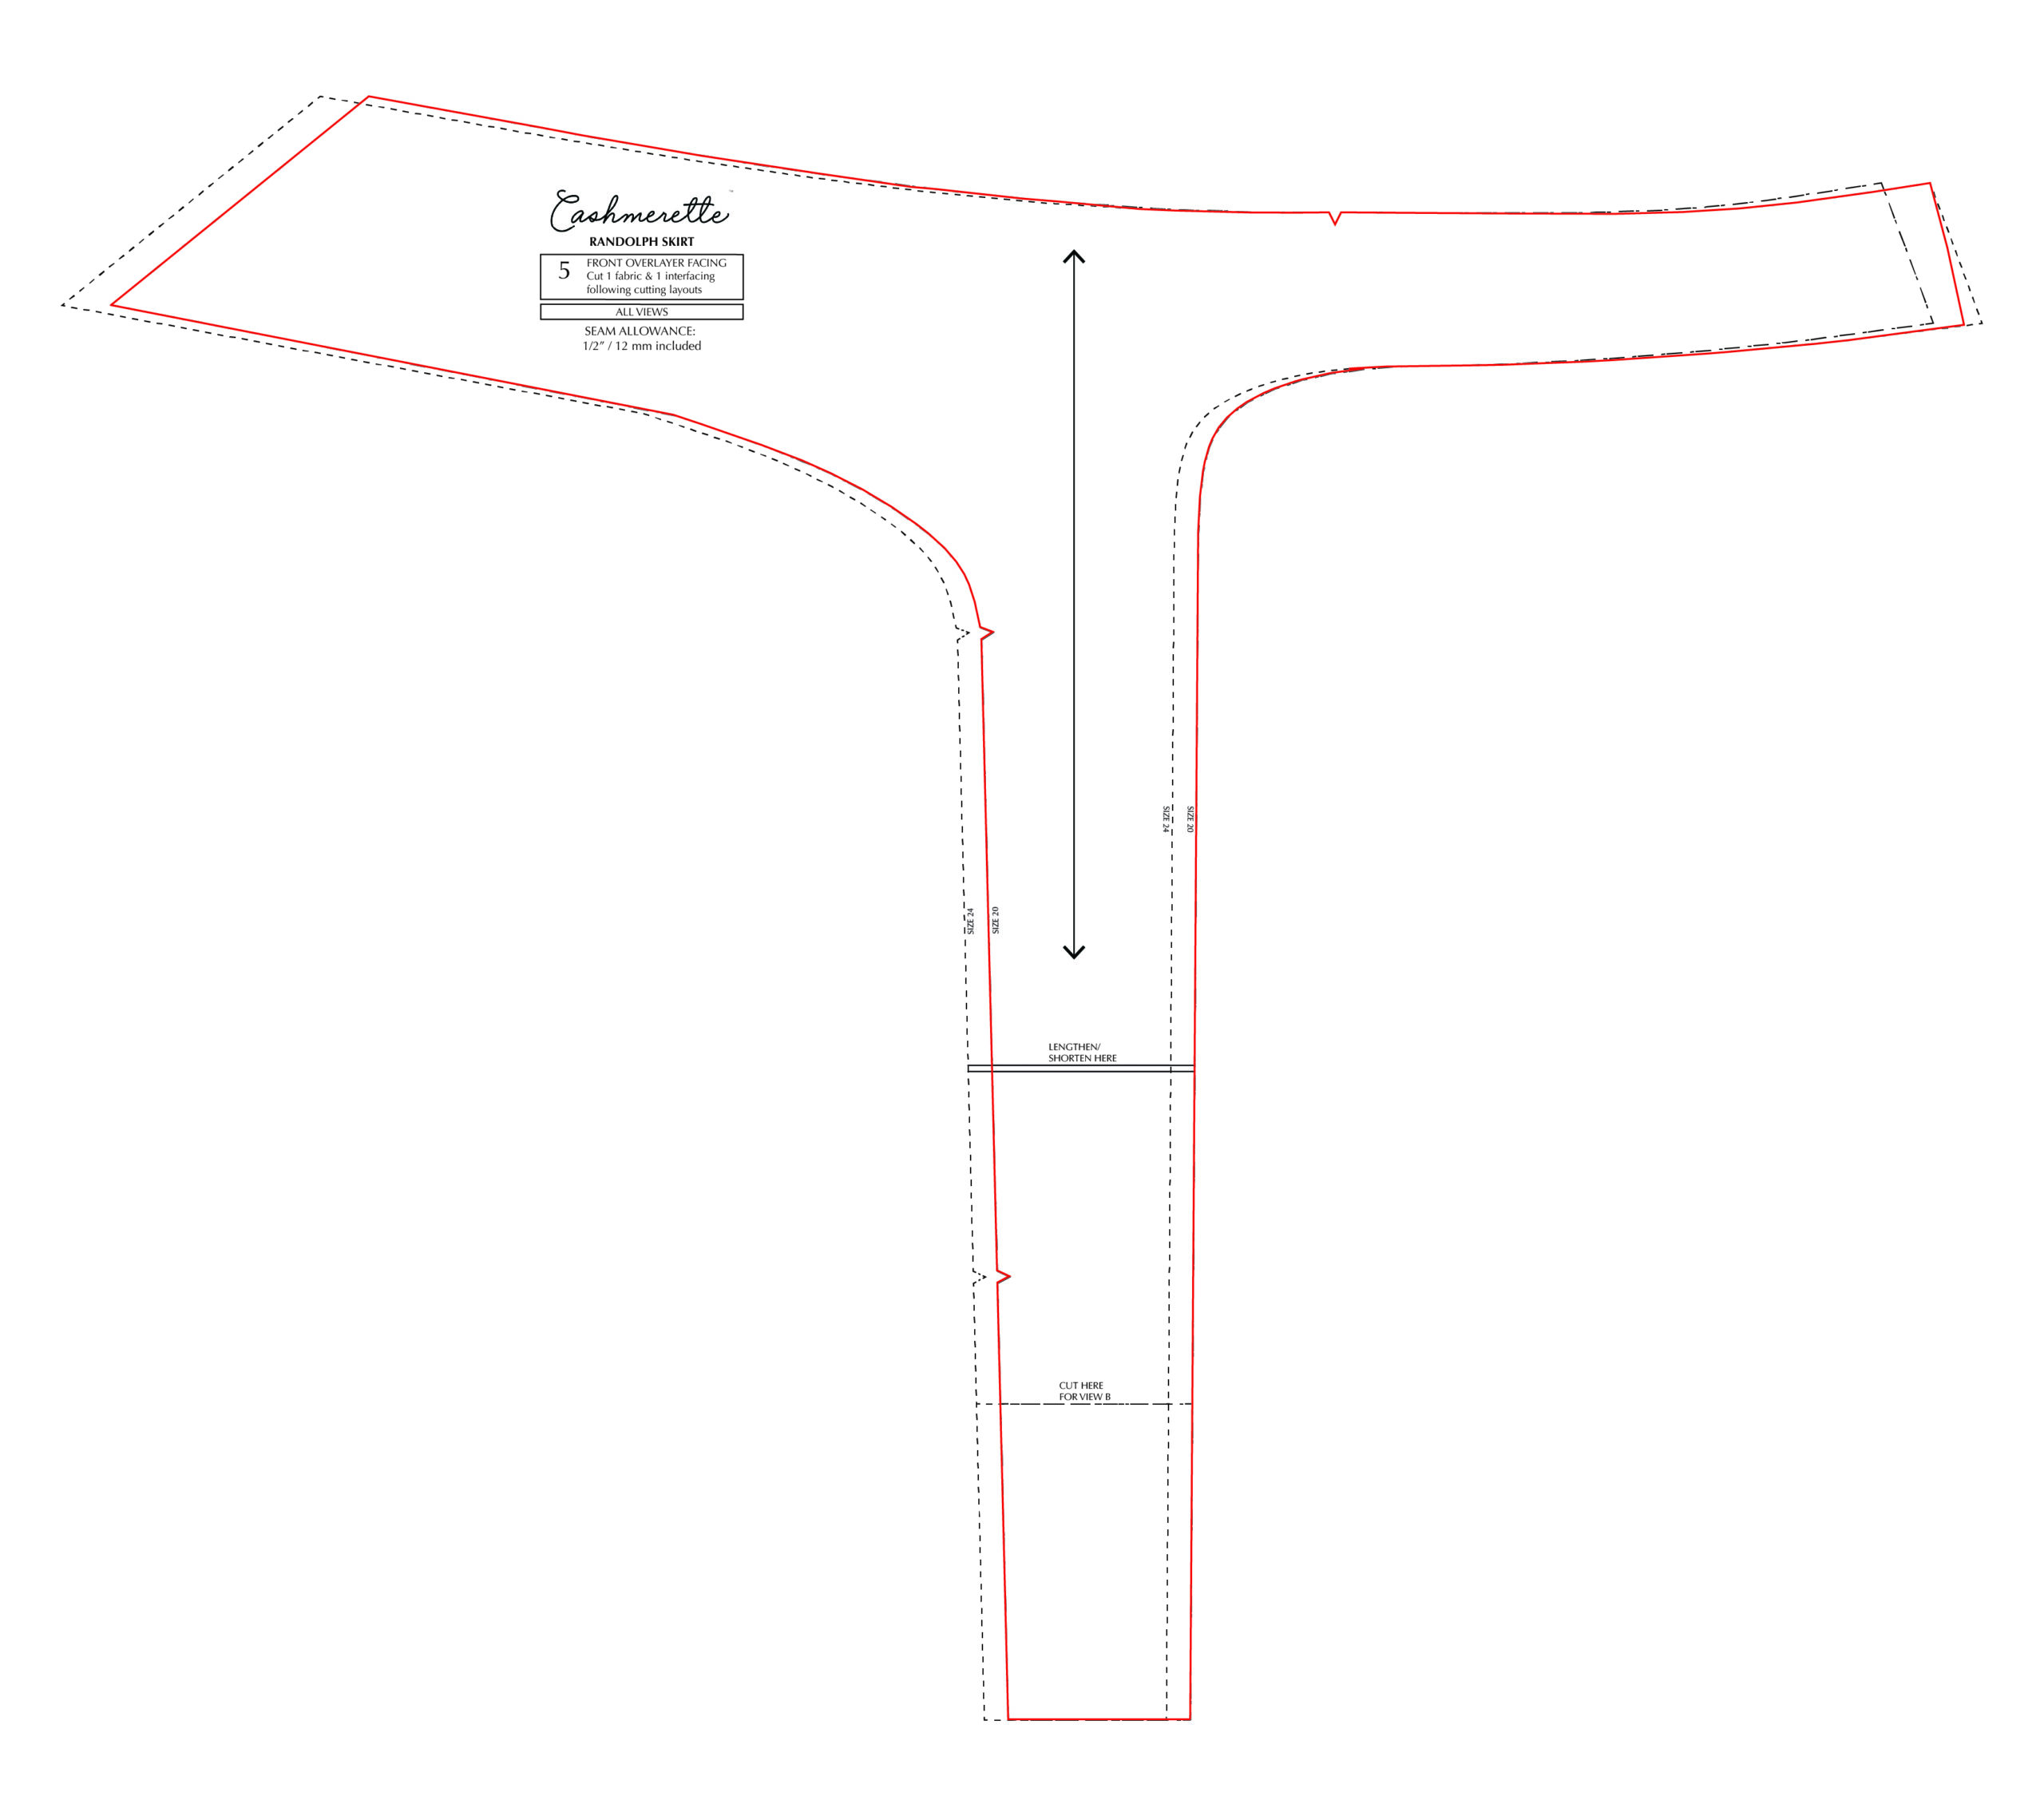
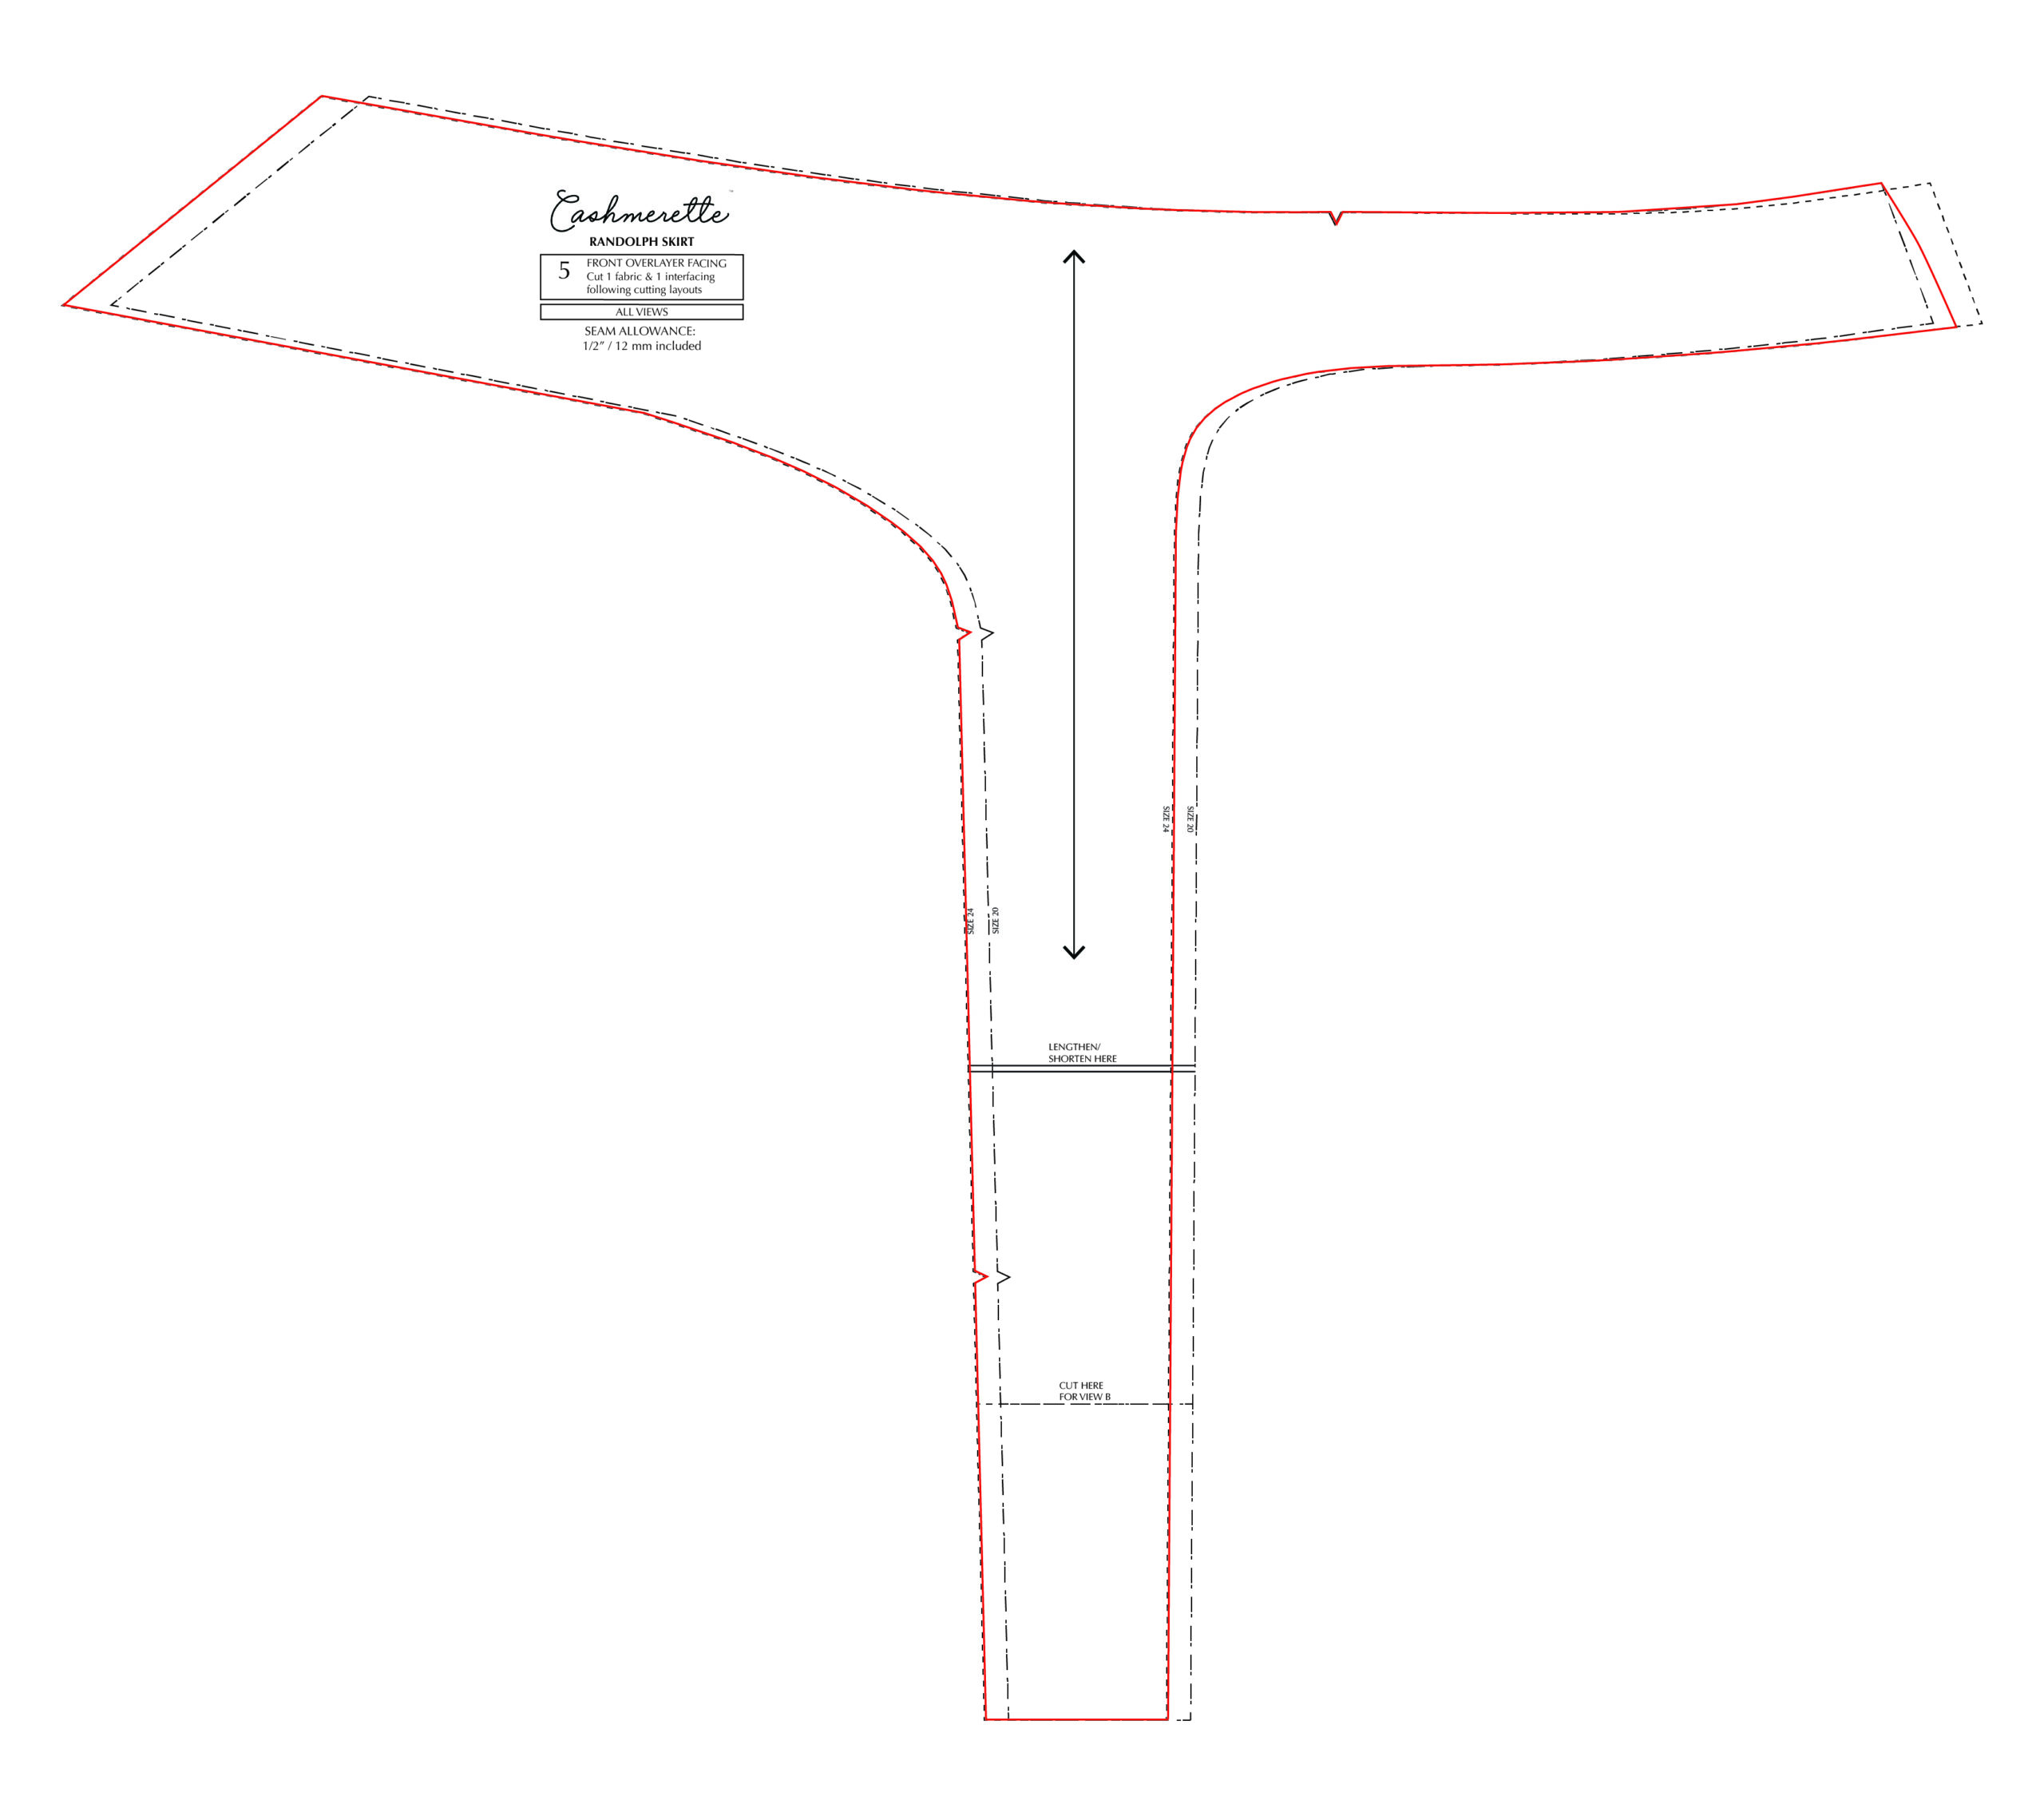
Front overlayer facing
For the front overlayer facing (piece #5), follow hip size (size 20) for the tie edges and the vertical edges.
On the right hand side, flip the facing piece over and line it up with the side seam of your graded front overlayer (#2) and grade from waist size (size 24) following new graded curve.
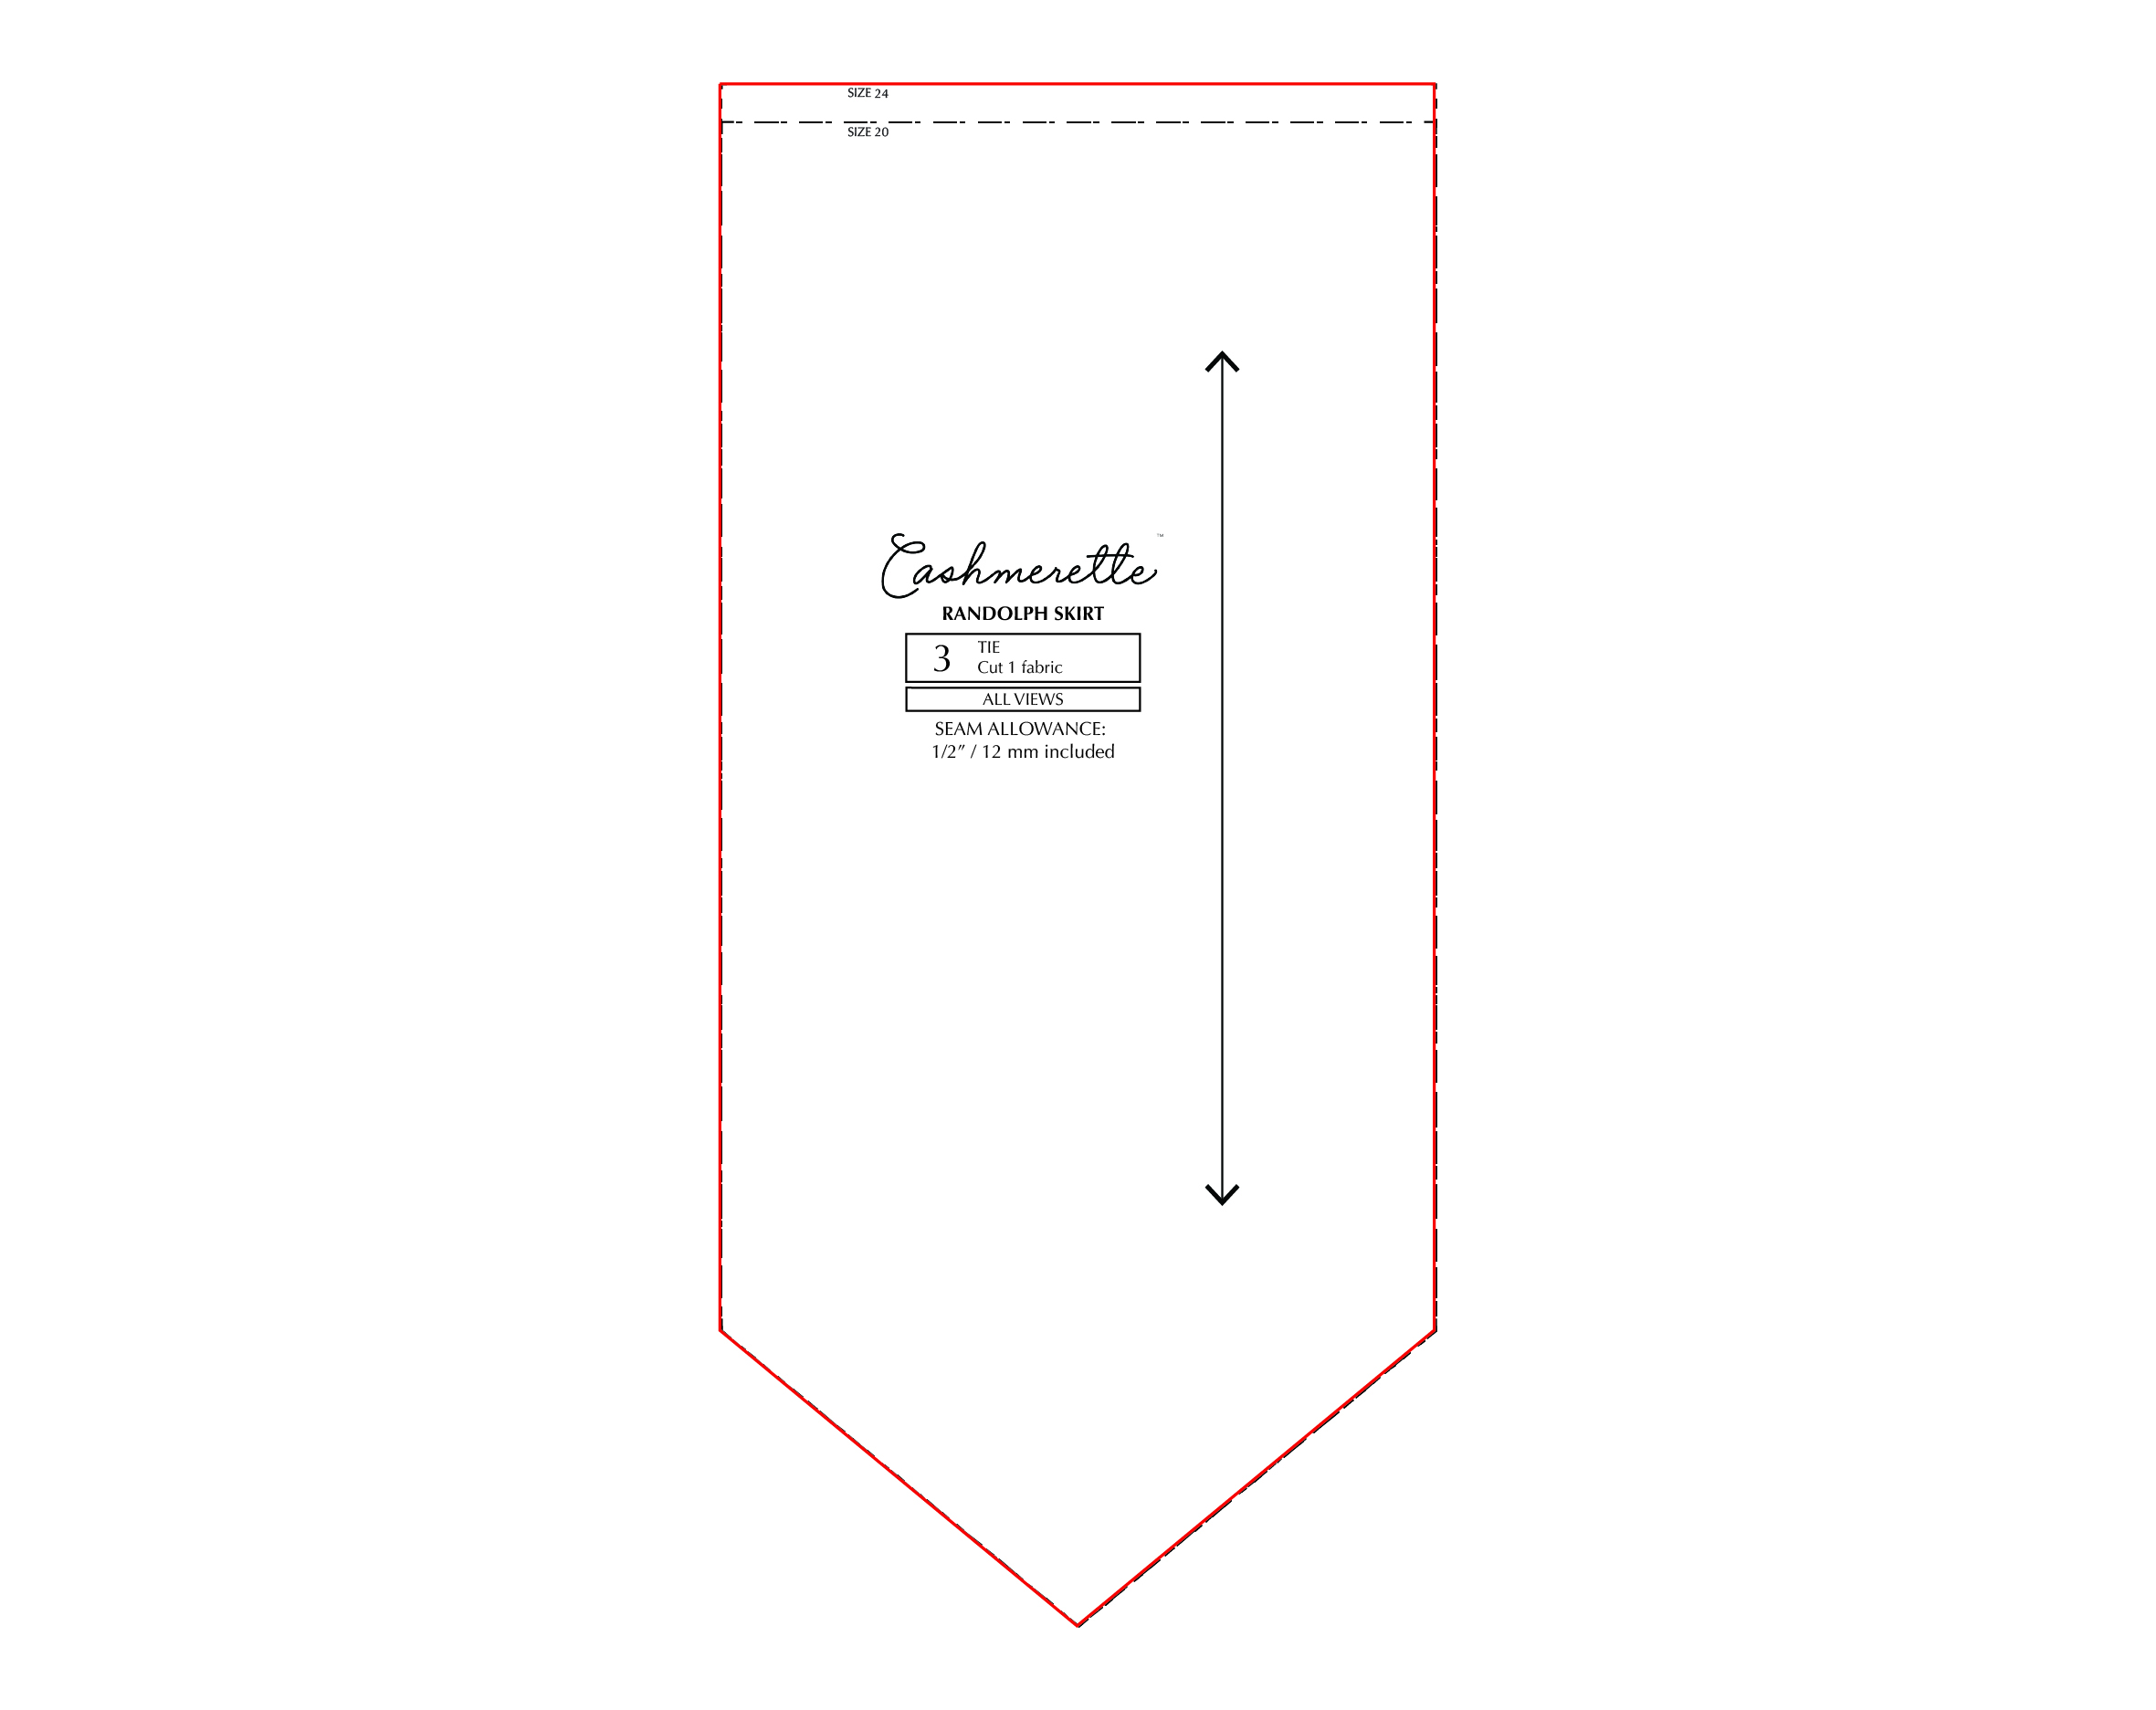
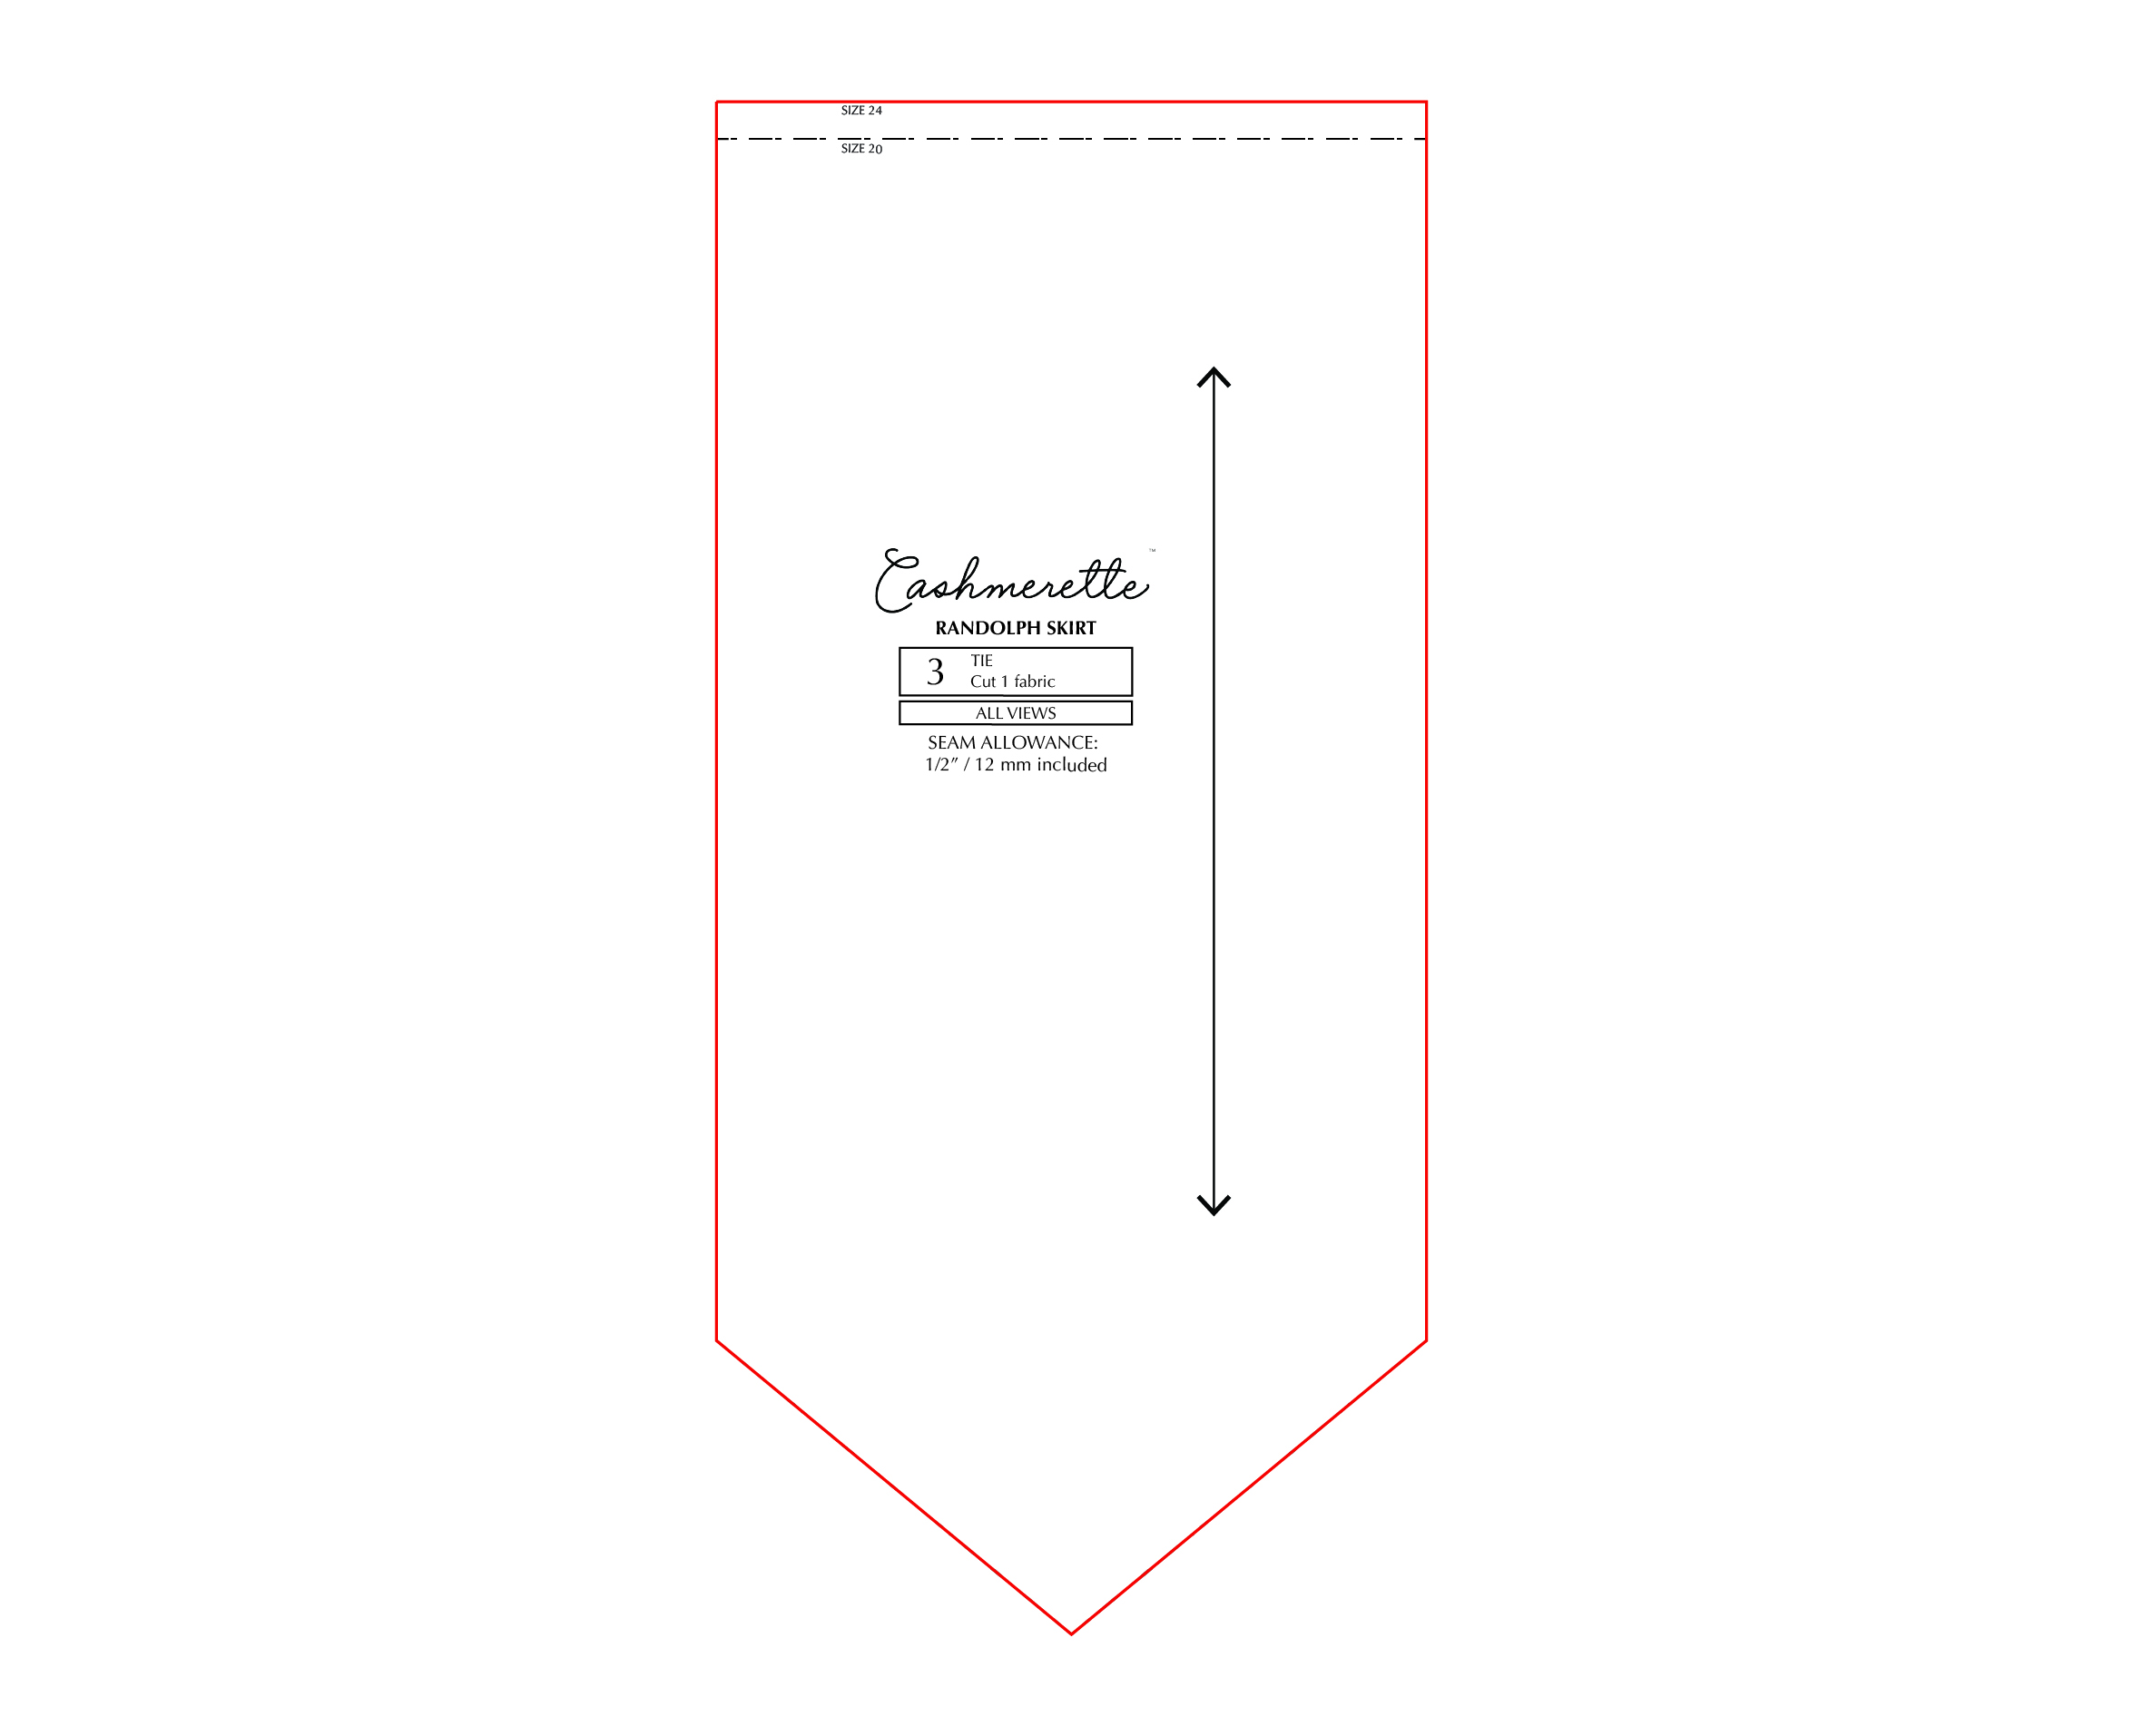
Tie
For the tie (piece #3), use tie size based on largest size (in this case, size 24).
Back facing
Line up the back facing (piece #6) with the side seam of your graded back (#1) and grade from waist size (size 24) following new graded curve.

If you’re grading from a smaller waist size to a larger hip size (such as a 20 waist to a 24 hip), you’ll want to follow these steps.
Back
For the back piece (piece #1), grade as per usual between waist (size 20) and hip notch (size 24) and use the waist dart based on waist (size 20) .
Front overlayer
For the front overlayer (piece #2), grade the left side as usual between waist (size 20) and hip notch (size 24). For the tie, cut to hip size (size 24).
Front underlayer
For the front underlayer (piece #4), grade the right side as usual between waist (size 20) and hip notch (size 24). Make sure you mark new position of tie notch.
For the inner edge, grade in a straight line between the waist size (size 20) at the top and the hip size (size 24) at the bottom.
Front overlayer facing
For the front overlayer facing (piece #5), follow hip size (size 24) for tie edges and the vertical edges.
On the right hand side, flip the facing piece over and line it up with the side seam of your graded front overlayer (#2) piece and grade from waist size (size 20) following your new graded curve.
Tie
For the tie (piece #3), use tie size based on the largest size (size 24).
Back facing
Line up the back facing (piece #6) with the side seam of your graded back (#1) and grade from waist size (size 20) following new graded curve.

Let’s start sewing!
If you’re ready to start sewing the wardrobe of your dreams, I hope you’ll check out my new book, “Sewing the Curve,” for more patterns and sewing tutorials.

Thank you for illustrating grading down to a smaller hip size as well as grading up! I know we are a rarer breed and I really appreciate seeing this done properly.